2.2.1 Controller Setup for RetroMi / RetroPie
Introduction
Setting up your game controller is one of the first steps after installing RetroMi on your Smart Pi One. EmulationStation needs to know how your gamepad buttons are mapped before you can navigate menus and play games.
This guide covers the initial configuration, hotkey shortcuts, and supported controller types.
2.2.1.1 First Boot — Controller Detection
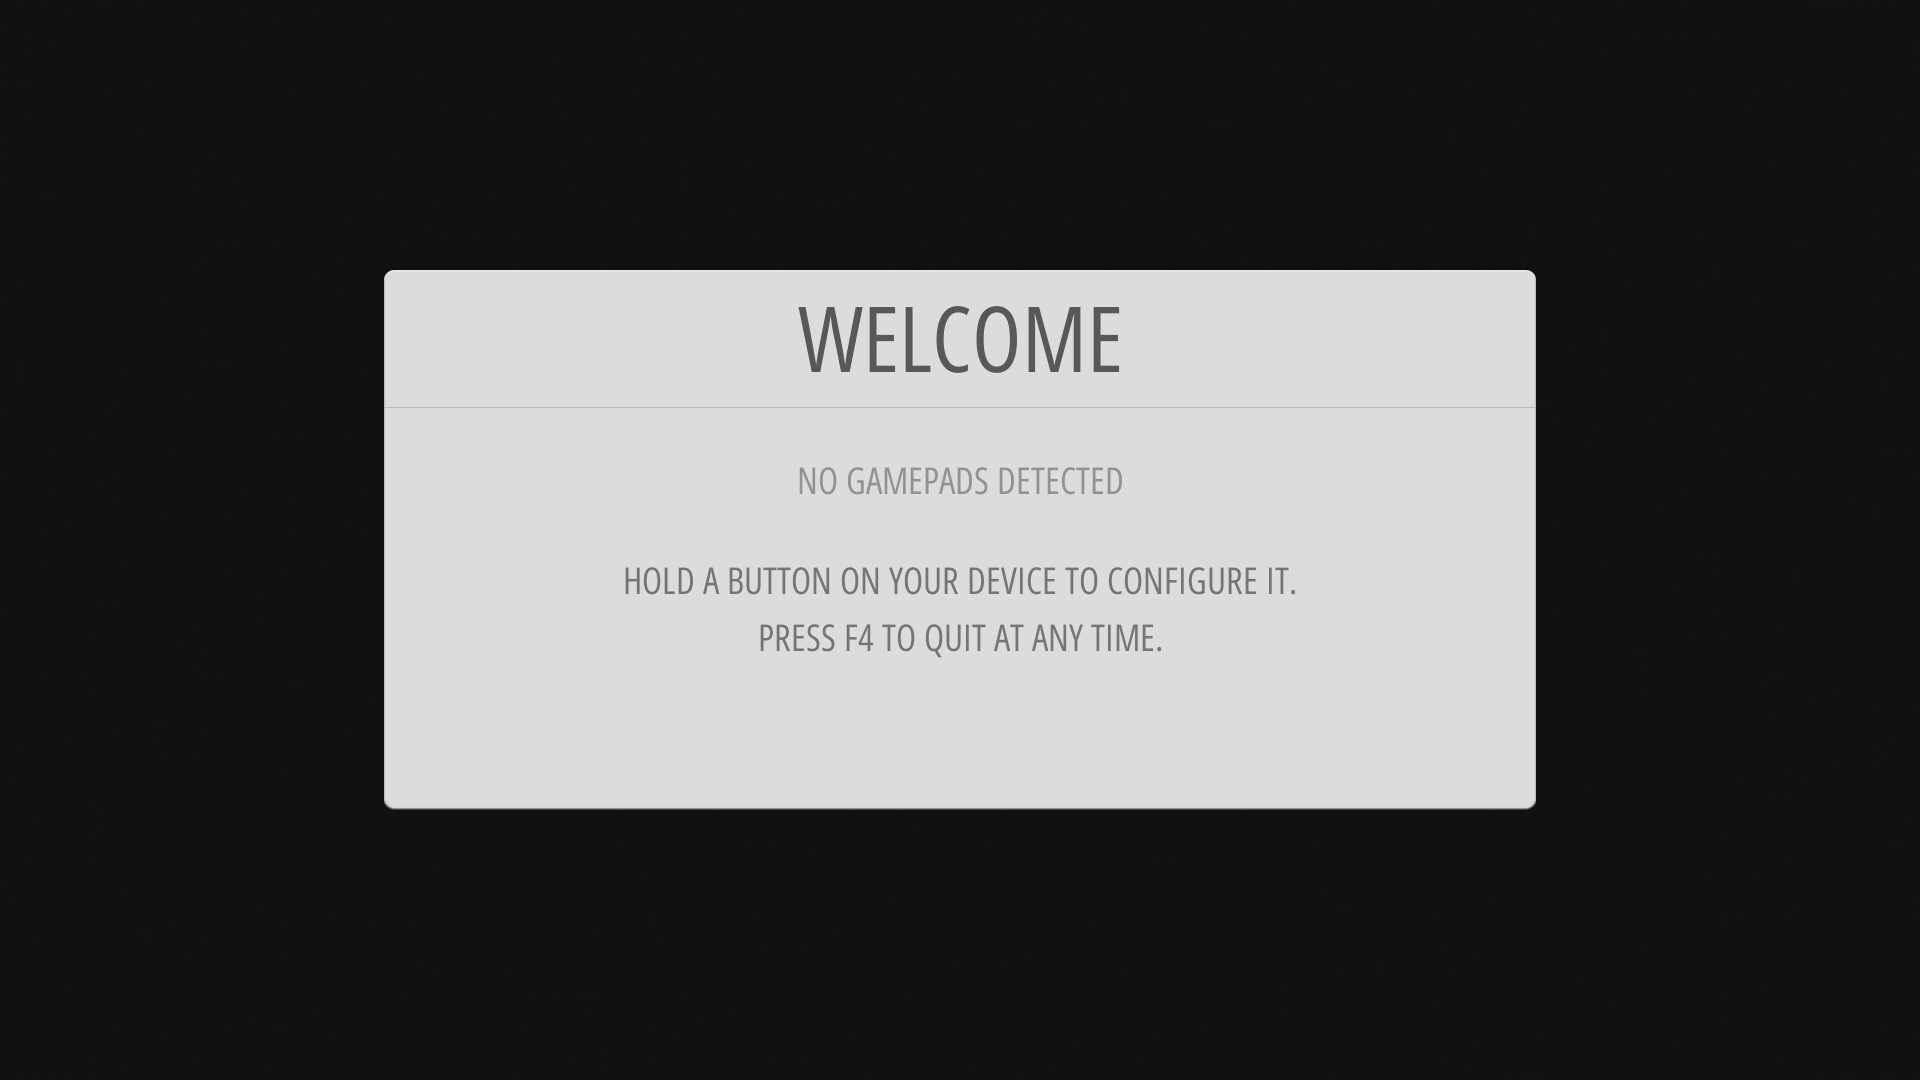
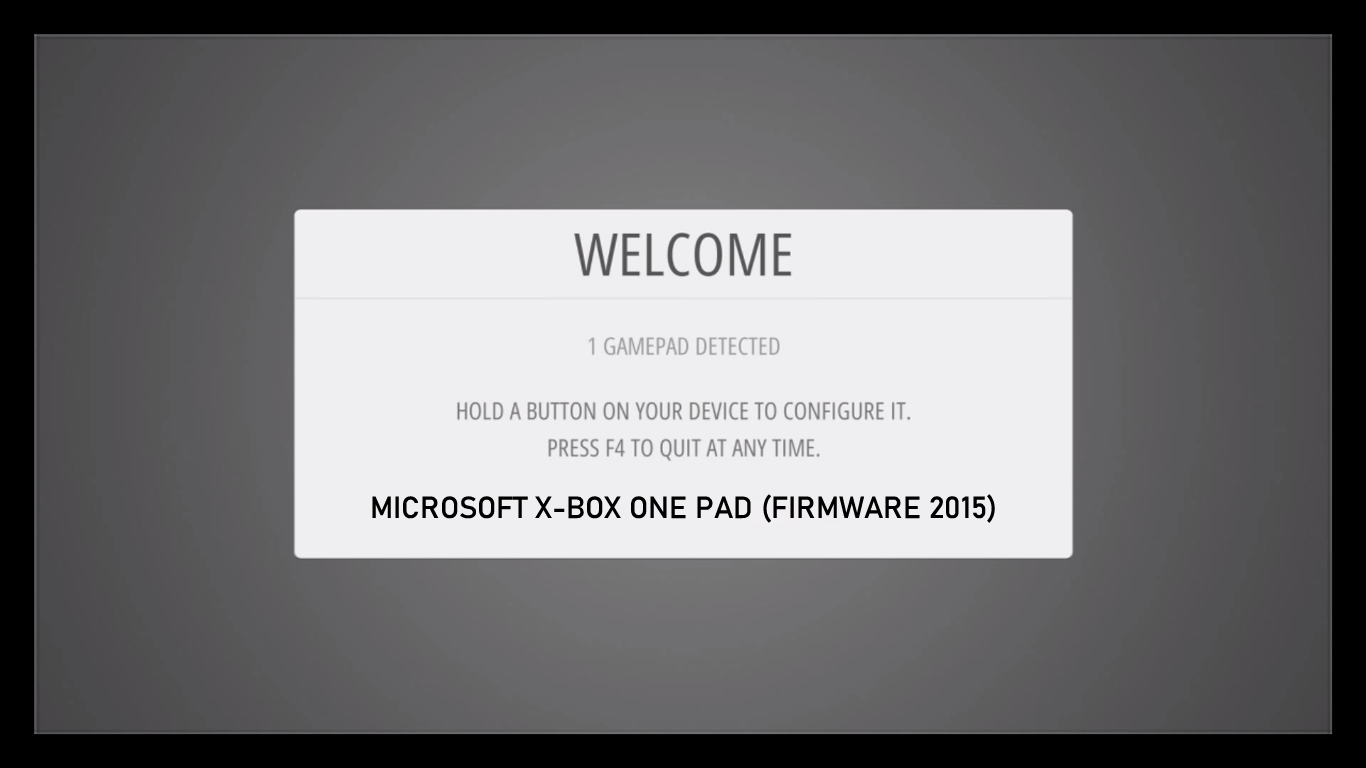
When EmulationStation starts for the first time, you will see the following screen:
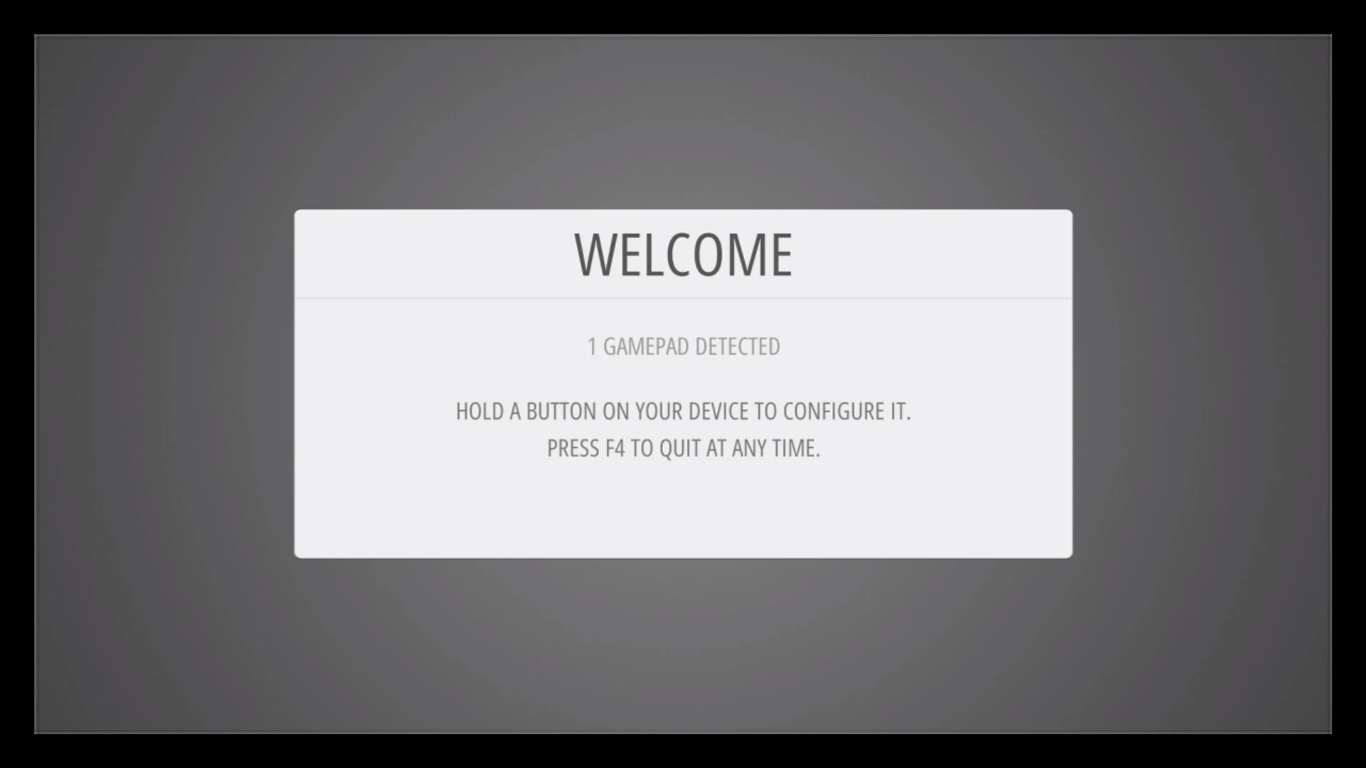
Press and hold any button on your gamepad (or keyboard). The device name will appear at the bottom of the screen, then EmulationStation will open the button mapping wizard.
Tip
If you are using a keyboard, press and hold any key to start configuration.
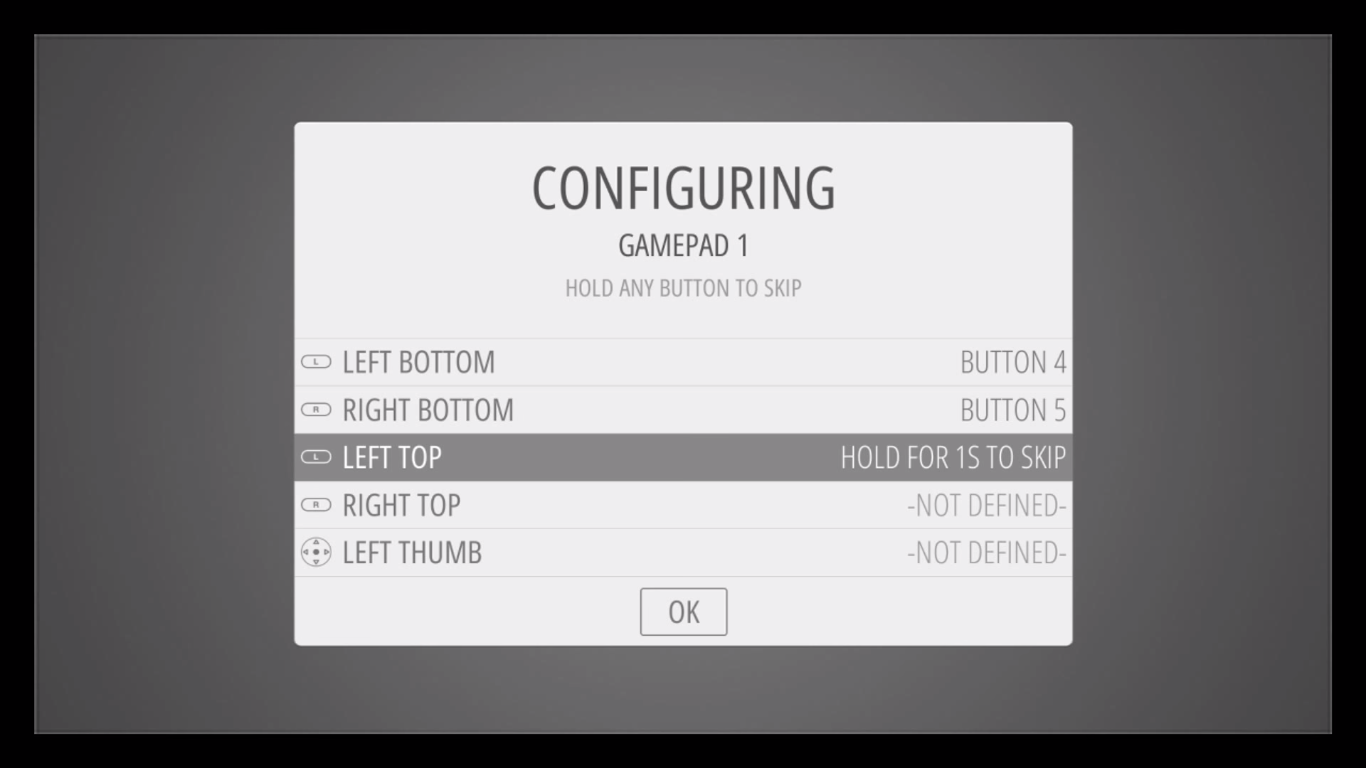
2.2.1.2 Button Mapping
Follow the on-screen prompts to assign each button one by one. EmulationStation will ask you to press the corresponding button on your controller for:
| Function | Description |
|---|---|
| D-PAD UP | Directional pad up |
| D-PAD DOWN | Directional pad down |
| D-PAD LEFT | Directional pad left |
| D-PAD RIGHT | Directional pad right |
| START | Start button |
| SELECT | Select button |
| A | East button (confirm) |
| B | South button (back) |
| X | North button |
| Y | West button |
| LEFT SHOULDER | L1 / LB |
| RIGHT SHOULDER | R1 / RB |
| LEFT TRIGGER | L2 / LT |
| RIGHT TRIGGER | R2 / RT |
| LEFT THUMB | Left stick click (L3) |
| RIGHT THUMB | Right stick click (R3) |
| LEFT ANALOG | Left analog stick (up/down/left/right) |
| RIGHT ANALOG | Right analog stick (up/down/left/right) |
| HOTKEY ENABLE | Hotkey button (recommended: SELECT) |
Skipping unused buttons
If your controller does not have a specific button (e.g., analog sticks on an SNES-style pad), hold down any already-mapped button for 2 seconds to skip it.
Once all buttons are mapped, press A on the "OK" prompt to save.
2.2.1.3 Supported Controller Layouts
RetroMi works with most USB and Bluetooth controllers. Below are the most common layouts:
SNES-style Controllers
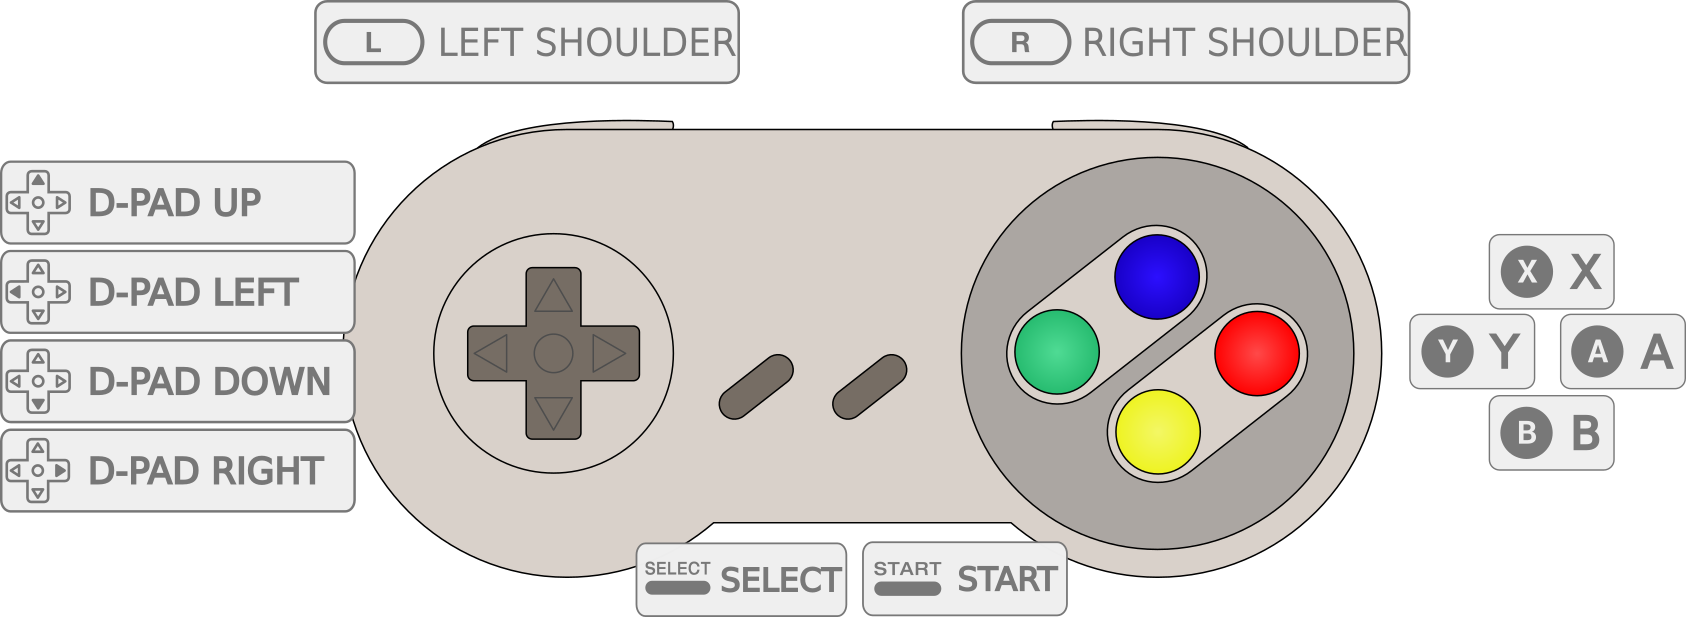
Classic layout with D-pad, 4 face buttons (A/B/X/Y), Start, Select, and two shoulder buttons (L/R). Ideal for 8-bit and 16-bit consoles.
Xbox-style Controllers (Xbox 360 / Xbox One / Xbox Series)
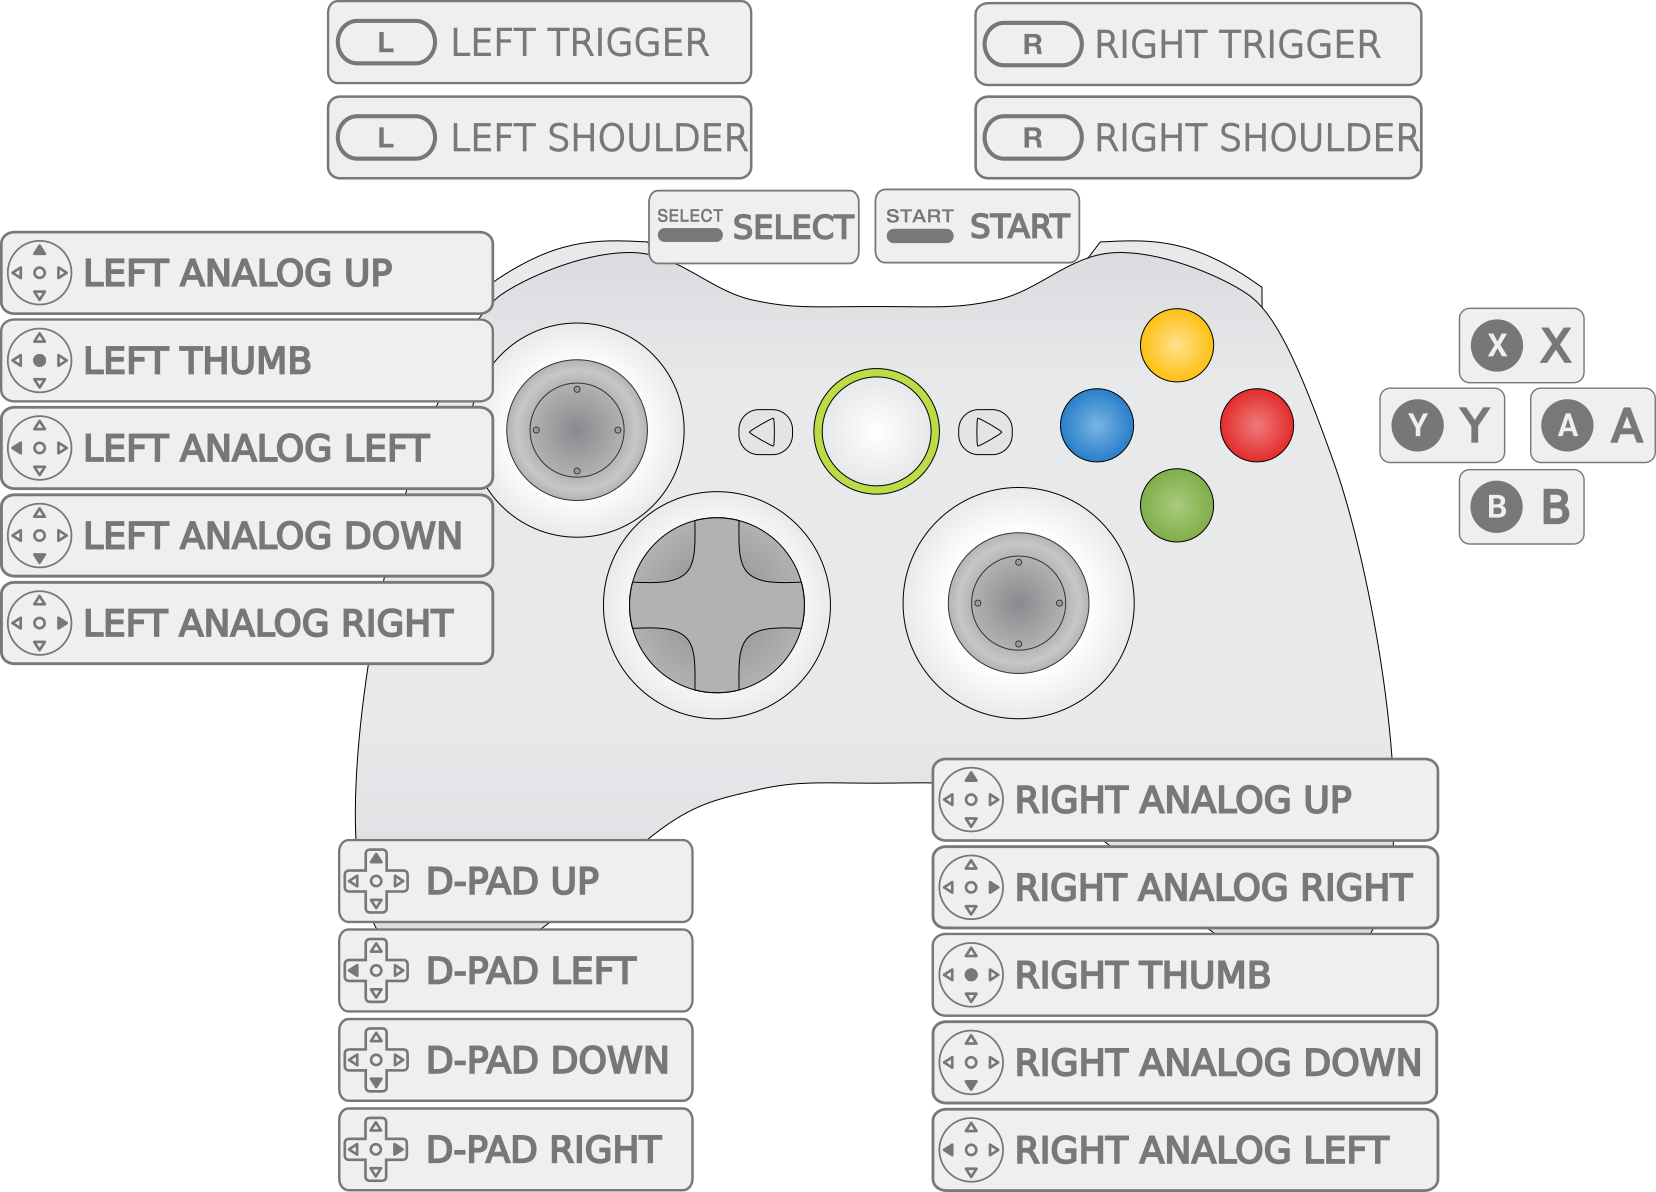
Full layout with D-pad, 4 face buttons, 2 analog sticks, 2 shoulder buttons (LB/RB), 2 triggers (LT/RT), and Start/Select (Menu/View). The Xbox button can be used as the Hotkey.
Xbox wireless controllers
Xbox controllers using the xpadneo driver are supported out of the box on RetroMi. Simply plug in the USB dongle or pair via Bluetooth.
PlayStation-style Controllers (DS3 / DS4 / DualSense)
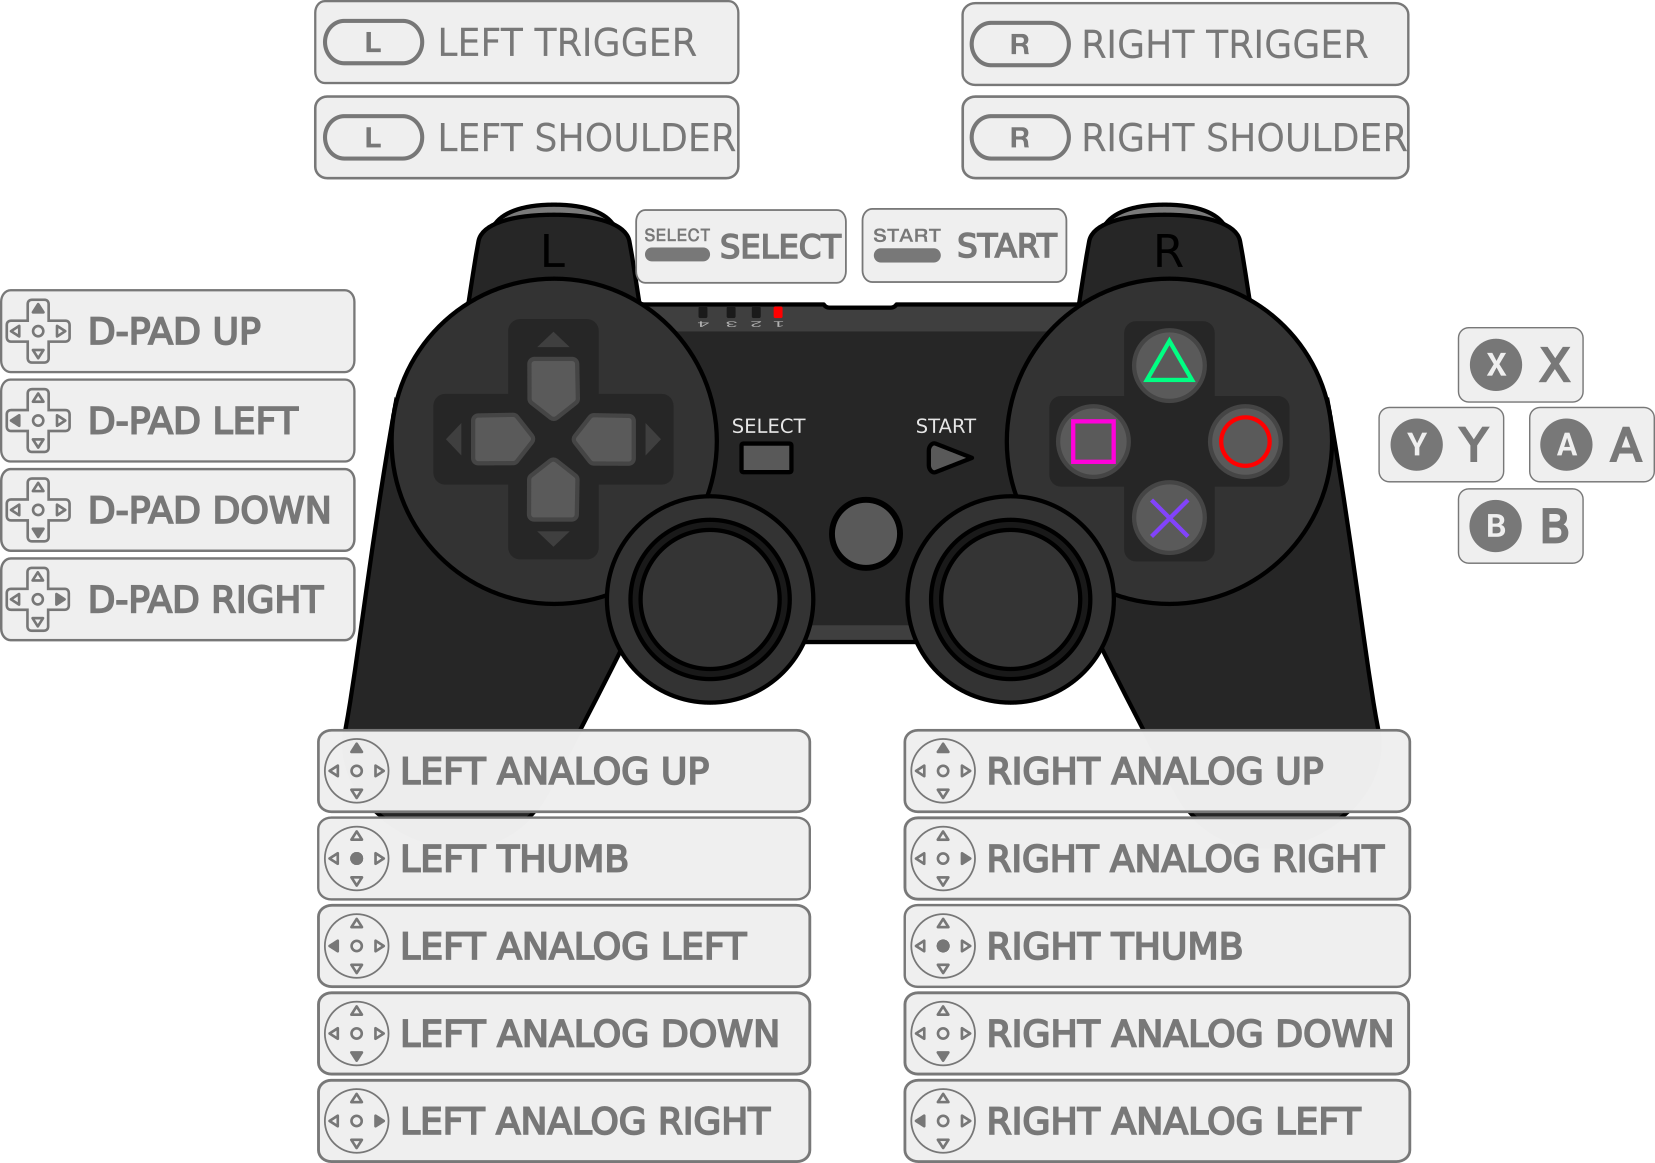
Full layout with D-pad, 4 face buttons (Cross/Circle/Triangle/Square), 2 analog sticks, L1/R1, L2/R2, L3/R3, and Share/Options. The PS button can be used as the Hotkey.
DualShock 4 via Bluetooth
Hold Share + PS for 3 seconds to enter pairing mode. Then pair from the RetroPie Bluetooth menu.
8BitDo Controllers
Most modern 8BitDo controllers use XInput mode (Xbox layout) by default. Hold the correct button combination when powering on to select the mode — refer to 8BitDo's documentation for your specific model.
2.2.1.4 Hotkey Shortcuts
The Hotkey button (usually SELECT) combined with other buttons gives you quick access to important functions during gameplay:
| Action | Button Combo |
|---|---|
| Exit game | Hotkey + Start |
| Save state | Hotkey + Right Shoulder |
| Load state | Hotkey + Left Shoulder |
| Next save slot | Hotkey + Right |
| Previous save slot | Hotkey + Left |
| RetroArch menu (RGUI) | Hotkey + X |
| Reset game | Hotkey + B |
Always use Hotkey + Start to exit
Never power off the Smart Pi One while a game is running. Always exit the game first using Hotkey + Start, then shut down properly from the EmulationStation menu.
2.2.1.5 Reconfiguring a Controller
If you need to remap your controller at any time:
- In EmulationStation, press Start to open the main menu
- Select Configure Input
- Hold a button on the controller you want to reconfigure
- Follow the mapping wizard again
2.2.1.6 Using a Keyboard as Controller
A keyboard can be configured as a controller using the same mapping wizard. Common default mappings:
| Keyboard Key | Function |
|---|---|
| Arrow keys | D-Pad |
| Enter | Start |
| Right Shift | Select |
| Z | A (confirm) |
| X | B (back) |
| A | X |
| S | Y |
Note
Keyboard mappings are fully customizable through the same configuration wizard.
2.2.1.7 Troubleshooting
Controller not detected
- Unplug and replug the USB controller
- Try a different USB port
- Reboot the Smart Pi One with the controller already plugged in
Buttons mapped incorrectly
- Go to Start > Configure Input and redo the mapping
- Make sure you pressed the correct physical buttons during the wizard
Bluetooth controller won't pair
- Make sure the controller is in pairing mode (flashing LED)
- Go to RetroPie menu > Bluetooth and follow the on-screen instructions
- Keep the controller close to the Smart Pi One during pairing
Controller works in menus but not in games
- Some emulators need their own controller configuration
- Open the RetroArch menu (Hotkey + X) during a game, then go to Settings > Input to configure per-emulator controls
For more details, refer to the official RetroPie controller documentation.