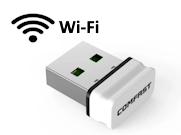
1.9 How to connect Wi-Fi

Prerequisites:
- Smart Pi One: Ensure your Smart Pi One is powered on and has a Wi-Fi module or dongle connected.
- NetworkManager and
nmcli: These should be installed by default on most Linux distributions for Smart Pi One. If not, install them using your package manager.
Steps:
1. Open a Terminal: Access the terminal on your Smart Pi One. You can do this directly if you have a monitor and keyboard connected, or via SSH if your Smart Pi One is already on the network.
2. Check if NetworkManager is Running: Ensure that NetworkManager is running. Start it if necessary:
3. Check Wi-Fi Device Status: List all network devices to find your Wi-Fi device:
Look for your Wi-Fi device, which should be listed aswifi type (e.g., wlan0).
4. Turn On the Wi-Fi Device: If your Wi-Fi is off, turn it on using:
5. List Available Wi-Fi Networks: Scan for available Wi-Fi networks:
This command lists all visible Wi-Fi networks. If this command runs indefinitely, for stop it by pressingCtrl + C.
6. Connect to a Wi-Fi Network:
Use the following command to connect to your desired Wi-Fi network. Replace YOUR_SSID with the network name and YOUR_PASSWORD with the Wi-Fi password:
7. Verify the Connection: Ensure your Smart Pi One is connected to the Wi-Fi network:
for stop it by pressingCtrl + C.
Identify the Wi-Fi IP Address:
The output of the hostname -I command might include multiple IP addresses if you have more than one network interface (e.g., Ethernet, Wi-Fi, VPNs, Docker interfaces). You will need to identify which one is the IP address of your Wi-Fi connection.