Kimi CLI on Smart Pi One
Kimi CLI is Moonshot AI's official Kimi command-line assistant, packaged by YUMI-LAB to run on the 32-bit ARM (Allwinner H3 / armv7l) Smart Pi One and Smart Pad — hardware Moonshot ships no 32-bit build for.
Repository: github.com/Yumi-Lab/kimi-cli-smartpi
1. How it works
Kimi CLI runs natively on the board, always on the latest version — it's the lighter, quickest-to-start of Moonshot's two tools. One command installs it, and the same command updates it. You sign in with your Kimi Code plan, or use an API key.
2. Requirements
armv7l/ 32-bit ARM SBC with at least 1 GB RAM- A Debian-based Linux distribution (tested on the Smart Pad — Debian 13 trixie armhf, Python 3.13)
~/.local/binon your$PATH- A Kimi Code plan (OAuth sign-in) or a Moonshot
KIMI_API_KEY
3. Installation
Run the one-line installer on your Smart Pi One as a normal user (not root):
The first install compiles a couple of C dependencies (e.g. Pillow) from source — a few minutes. The installer is idempotent and doubles as the updater: re-run it any time.
Limiting the install compile
The compile uses all 4 cores by default. To keep the board cooler (e.g. a passively-cooled unit) or leave cores free for other work, cap it with KIMI_BUILD_CPUS:
KIMI_BUILD_CPUS=0,1 curl -fsSL https://raw.githubusercontent.com/Yumi-Lab/kimi-cli-smartpi/main/install.sh | bash
4. Authentication
Two ways to authenticate — OAuth with your Kimi Code plan, or a Moonshot API key.
OAuth device flow (Kimi Code plan, no API key)
It prints a verification URL and a short code. Open the URL in a browser on any machine, approve it on your Kimi account, and the CLI polls and completes automatically — no local browser needed.
API key (Moonshot platform, pay-as-you-go)
Create keys at platform.moonshot.ai (or the .cn console).
5. Usage
| Command | Purpose |
|---|---|
kimi |
Full interactive agent TUI (native execution) |
kimi -p "your question" |
Start from a prompt, then continue interactively |
kimi --quiet -p "your task" |
One-shot mode — final answer only |
kimi login |
Sign in — OAuth device flow (Kimi Code plan); or set KIMI_API_KEY |
kimi-check-update |
OTA probe — one JSON line |
KIMI_CPUS=0,1 kimi … |
Pin the running agent to a CPU subset (default = all 4 cores) |
In agent mode, Kimi CLI can read and edit files and run commands on the board — useful for scripting the GPIO sensors, configuring services, or working through Smart Pi projects.
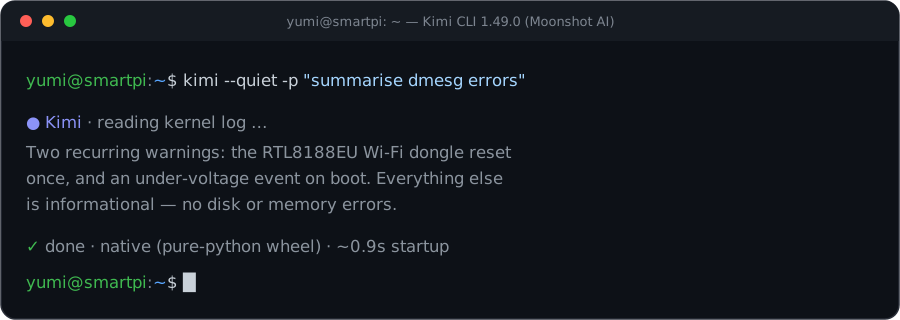 Example interface (illustration — real capture pending).
6. Notes
- Native, no emulation: unlike Grok CLI (which runs under QEMU), Kimi CLI runs directly as a Python tool — fast to start. One-shot latency is bounded by Moonshot's remote inference, not the board.
- Updating: re-run
install.sh— that is the updater (it upgrades in place). Do not run a bareuv tool install/uv tool upgrade kimi-cliyourself — it drops the YUMI-LABKIMI_CPUSwrapper; the installer restores it.kimi-check-updateprints{installed, latest, update_available}. - CPU control:
KIMI_BUILD_CPUSbounds the one-time install compile;KIMI_CPUSbounds the running agent. Both default to all 4 cores — cap them (e.g.0,1) to run cooler or free cores. earlyoomis installed as a memory safety net on the 1 GB board. Rule of thumb: run one heavy CLI at a time.- Licensing: the installer scripts are MIT (YUMI-LAB); Kimi CLI itself remains subject to Moonshot AI's terms and is installed from the official PyPI package at runtime.