1.5 How to Access KlipperScreen on SmartPad via VNC

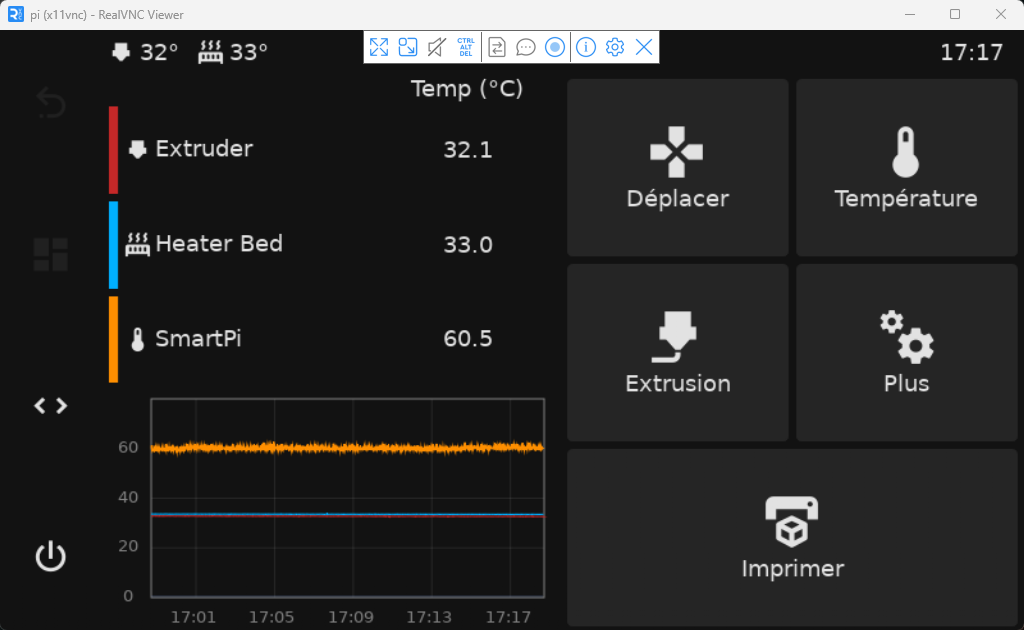
This tutorial explains how to remotely view and control the KlipperScreen interface on your YUMI SmartPad using VNC. It shares the actual framebuffer of the SmartPad’s screen, including the correct rotation, allowing you to see exactly what is displayed.
Prerequisites
- YUMI SmartPad with KlipperScreen running
- Network connection between the SmartPad and your computer
- SSH access to the SmartPad
- A VNC client installed on your computer (e.g., TightVNC Viewer, RealVNC, UltraVNC)
Steps
1. Connect to the SmartPad via SSH
- Find the SmartPad’s IP address in the network settings.
- Open a terminal on your computer and connect via SSH:
Replace smartpad_ip_address with the actual IP of your SmartPad.
2. Install x11vnc (if not installed)
3. Start the VNC server on the SmartPad
Run this command to start sharing the SmartPad’s screen with correct rotation:
sudo x11vnc -rawfb /dev/fb0 -rotate 180 -scale 1024x600 -passwd your_password -forever -shared -nocursor
-rawfb /dev/fb0: captures the physical framebuffer-rotate 180: rotates the image upright-scale 1024x600: adapts resolution for your PC-passwd your_password: sets the VNC password (replaceyour_passwordwith your chosen password)-forever: keeps the server running after disconnects-shared: allows multiple simultaneous connections
Leave this command running while you want to use VNC.
4. Connect from your computer using a VNC client
- Open your preferred VNC viewer (e.g., TightVNC Viewer).
- Enter the SmartPad’s IP address and port
5900, e.g.:
Automate VNC Server Startup with systemd
To launch the VNC server automatically on boot, create a systemd service.
1. Create the service file
Run:
2. Paste the following content
[Unit]
Description=Start x11vnc to share SmartPad framebuffer
After=network.target

[Service]
Type=simple
ExecStart=/usr/bin/x11vnc -rawfb /dev/fb0 -rotate 180 -scale 1024x600 -passwd your_password -forever -shared -nocursor
Restart=always
RestartSec=10

[Install]
WantedBy=multi-user.target
Replace
your_passwordby the password you want for VNC access.
3. Save and close (Ctrl+O, Enter, Ctrl+X)
4. Enable and start the service
sudo systemctl daemon-reload
sudo systemctl enable x11vnc.service
sudo systemctl start x11vnc.service
5. Check the service status
The VNC server will now start automatically on every boot.
Troubleshooting
- Make sure SmartPad and your computer are on the same network.
- If the image orientation is incorrect, adjust the
-rotateparameter accordingly (0, 90, 180, or 270). - To stop the VNC server: