1.7 Wireless Control
The YUMI L Series (Lasers) can be controlled over Wi-Fi without a physical display, using a PC, smartphone, or tablet. This section explains how to connect the laser to Wi-Fi, and how to access the Web Control Interface.
1.7.1 Connection Methods
Method 1 – Serial Command via USB
-
Install USB Driver (if needed)
-
The MKS DLC32 controller uses a CH340 USB-to-serial chip.
- Some PCs (especially Windows) require the driver to be installed so the laser can be detected as a COM port.
- On Windows, check the assigned COM port in Device Manager.
-
On Linux/macOS, the driver is usually included by default.
-
Connect to the Laser
-
Open LaserGRBL, LightBurn, or another serial console.
-
Select the laser’s COM port and connect at 115200 baud.
-
Send Wi-Fi Credentials (replace with your own network details):
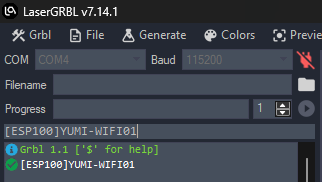
-
Retrieve IP Address
-
In most cases, once the Wi-Fi connection is successful, the controller will automatically display the IP address in the console or software window.

- If the IP is not shown automatically, you can request it manually by sending the command:
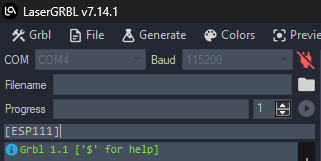
- The laser will then return its assigned IP address (e.g.,
192.168.0.105).

Method 2 – Setup via SD Card (dlc_cfg.txt)
-
Insert the SD card into your computer.
-
Create or edit the file dlc_cfg.txt (the filename must be exactly this).
-
Add your Wi-Fi credentials, for example:
//--WIFI configuration---//
[ESP110]STA
[ESP131]8080
//wifi name
[ESP100]Your_WiFi_Name(SSID)
//wifi password
[ESP101]Your_WiFi_Password
-
Do not modify other parameters.
-
Save the file and insert the SD card into the controller.
-
Power cycle the device.
-
Update takes ~10 seconds.
-
After reboot, the laser connects to Wi-Fi automatically (in about 5 seconds).
-
Retrieve the IP address:
-
From your router’s DHCP list, or
- By sending
[ESP111]once via USB.

Method 3 – Using MKS Laser Tool
-
Connect the laser via USB and select the detected COM port.
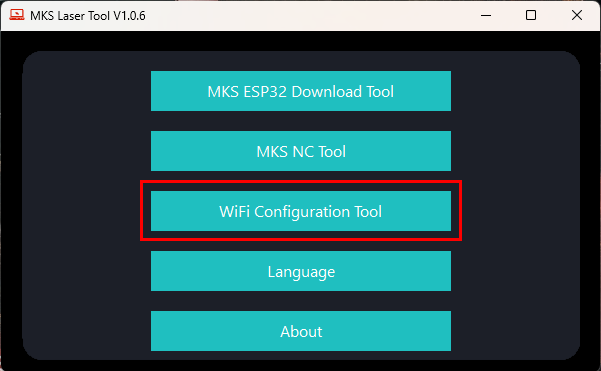
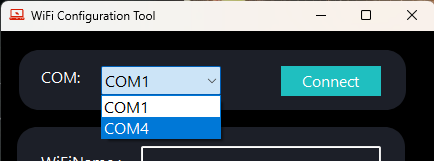
- Enter Wi-Fi SSID and password, then click Connect Wi-Fi.
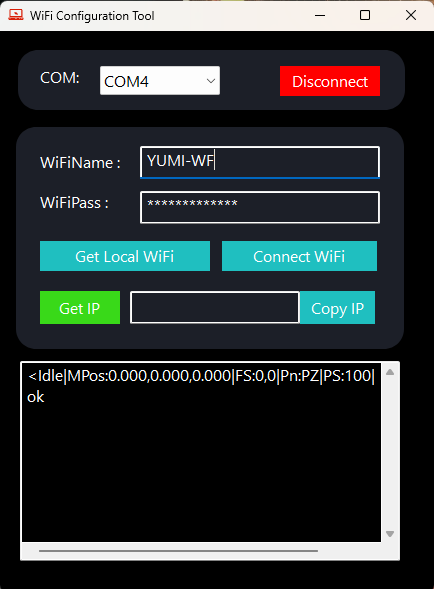
- The software displays the assigned IP address.
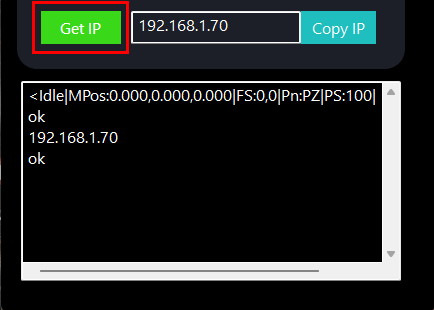
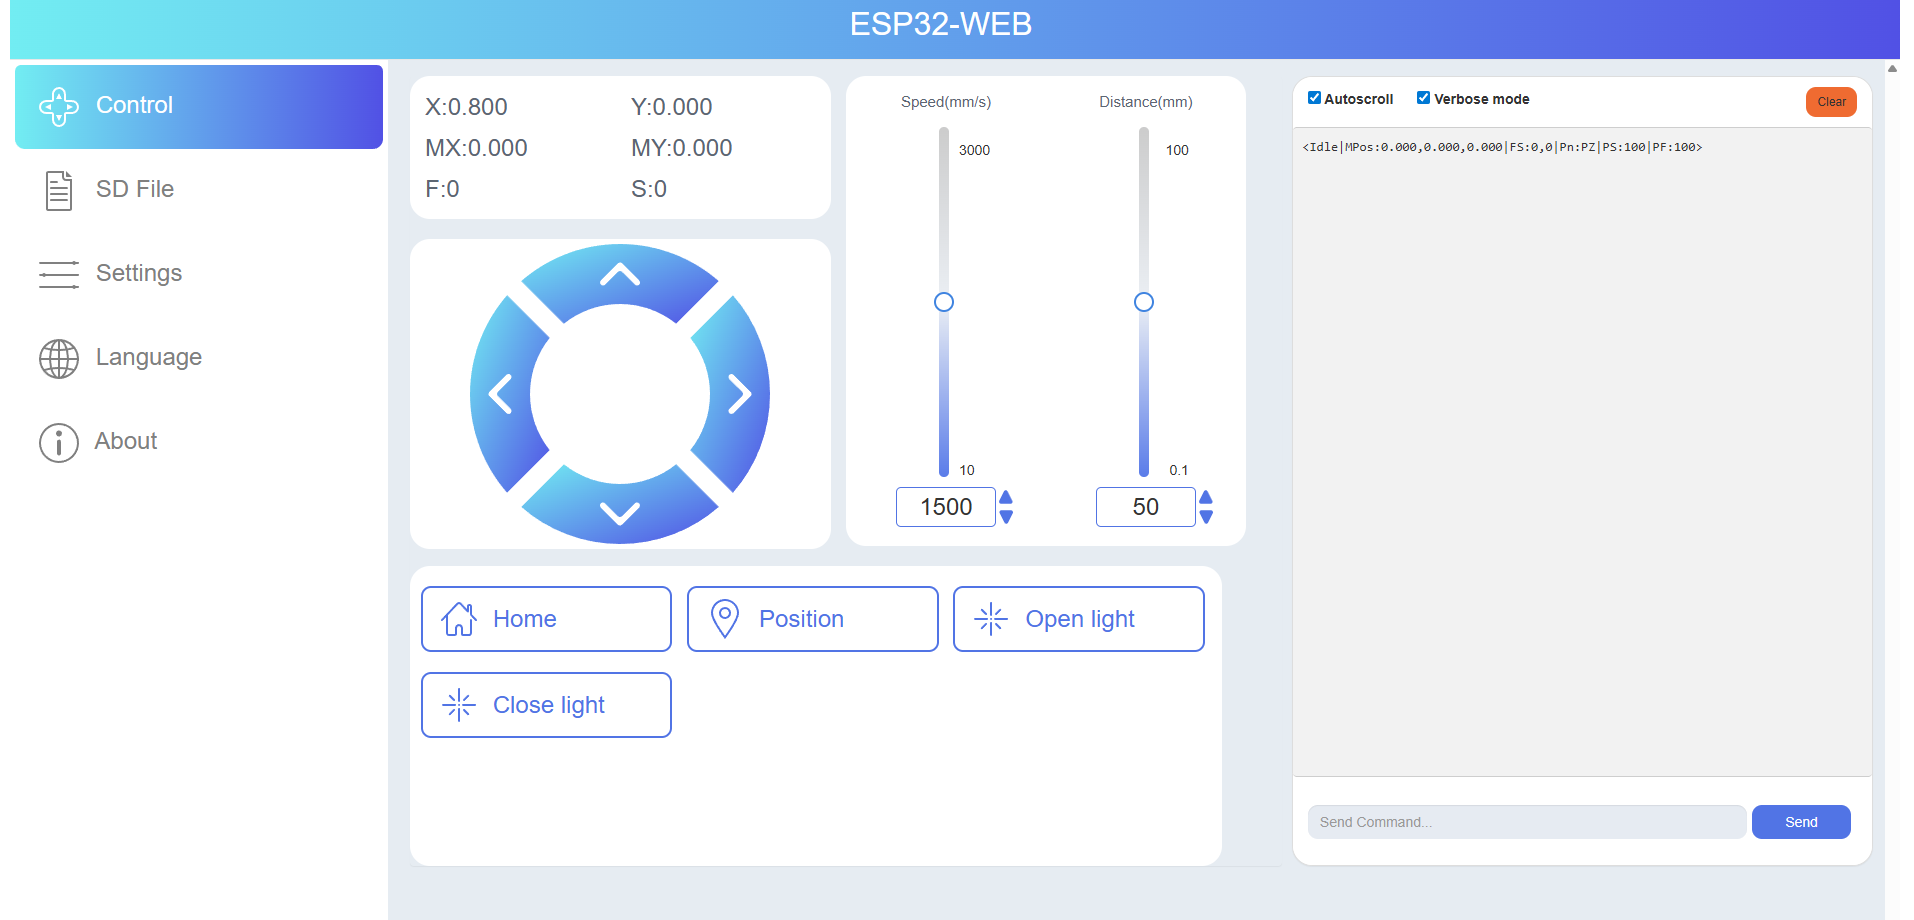
1.7.2 Accessing the Web Control Interface
Once the laser is connected to Wi-Fi and the IP address is obtained:
-
Open your web browser.
-
Enter the laser’s IP address (e.g.,
http://192.168.1.70).

- The Web Control Panel appears.
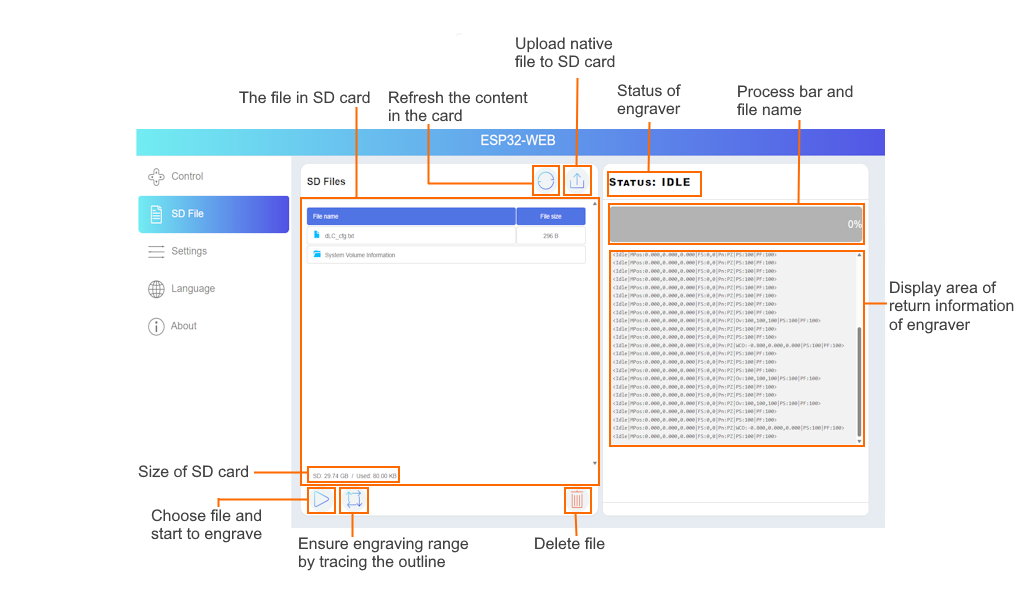
1.7.3 Web Control Panel Features
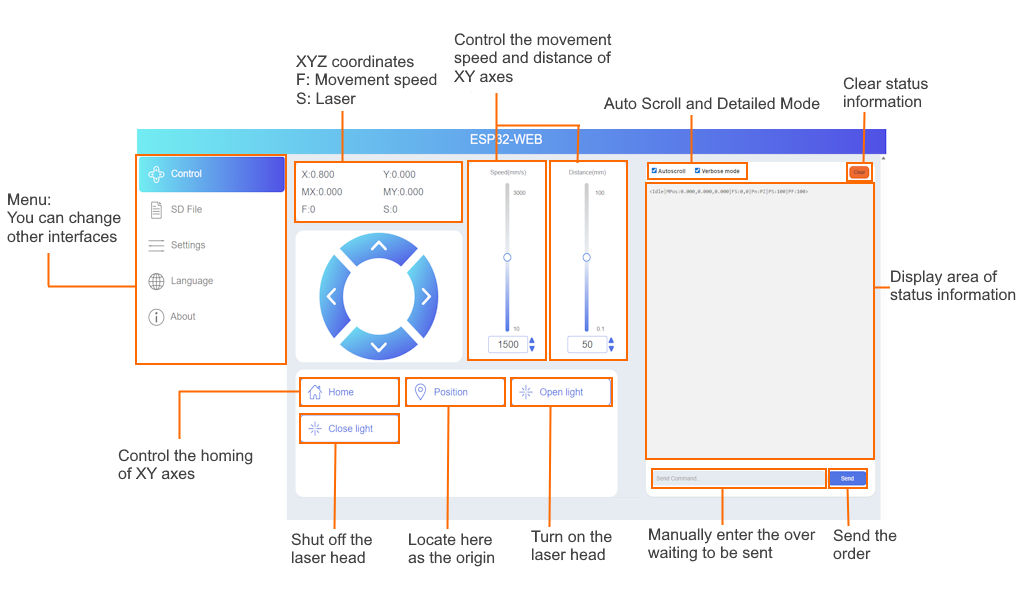
Below are examples of the Web Control Panel showing key functions:
-
Main Controls
-
Move the laser head manually
-
Adjust laser power and speed
-
File Management (SD Card)
-
Upload, select, and delete files
-
Monitor job progress in real-time
1.7.3 Tips for Stable Wireless Use
- Keep the laser close to your Wi-Fi router
- Avoid congested Wi-Fi channels
- For large files, USB transfer is more reliable