Klipper Wanhao D12 installation
This procedure is for anyone who has a WANHAO D12 and a SmartPad klipper control device.
Please read the procedure first
You are responsible for all operations carried out on your equipment. This procedure explains how to set up KLIPPER on your 3D printer. It has been tested and is fully functional.
Hardware and software :
First Step: Identify your motherboard model and motor driver connections. We recommend updating your printer to the official MARLIN 2 release available at WanhaoFrance https://formation.wanhaofrance.com/slides/slide/firmware-d12-230-758?fullscreen=0&fullscreen=1
If you have a BLTouch and cannot find your specific firmware, do not worry. The most critical step is to ensure axis homing for all three axes is successfully executed and to verify that all motors, including the extruder motor, are rotating in the correct direction.
If everything checks out, navigate to Settings > About to view all the details for upgrading to Klipper with the smart pad.
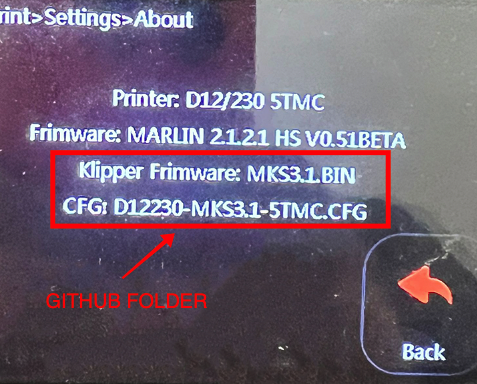
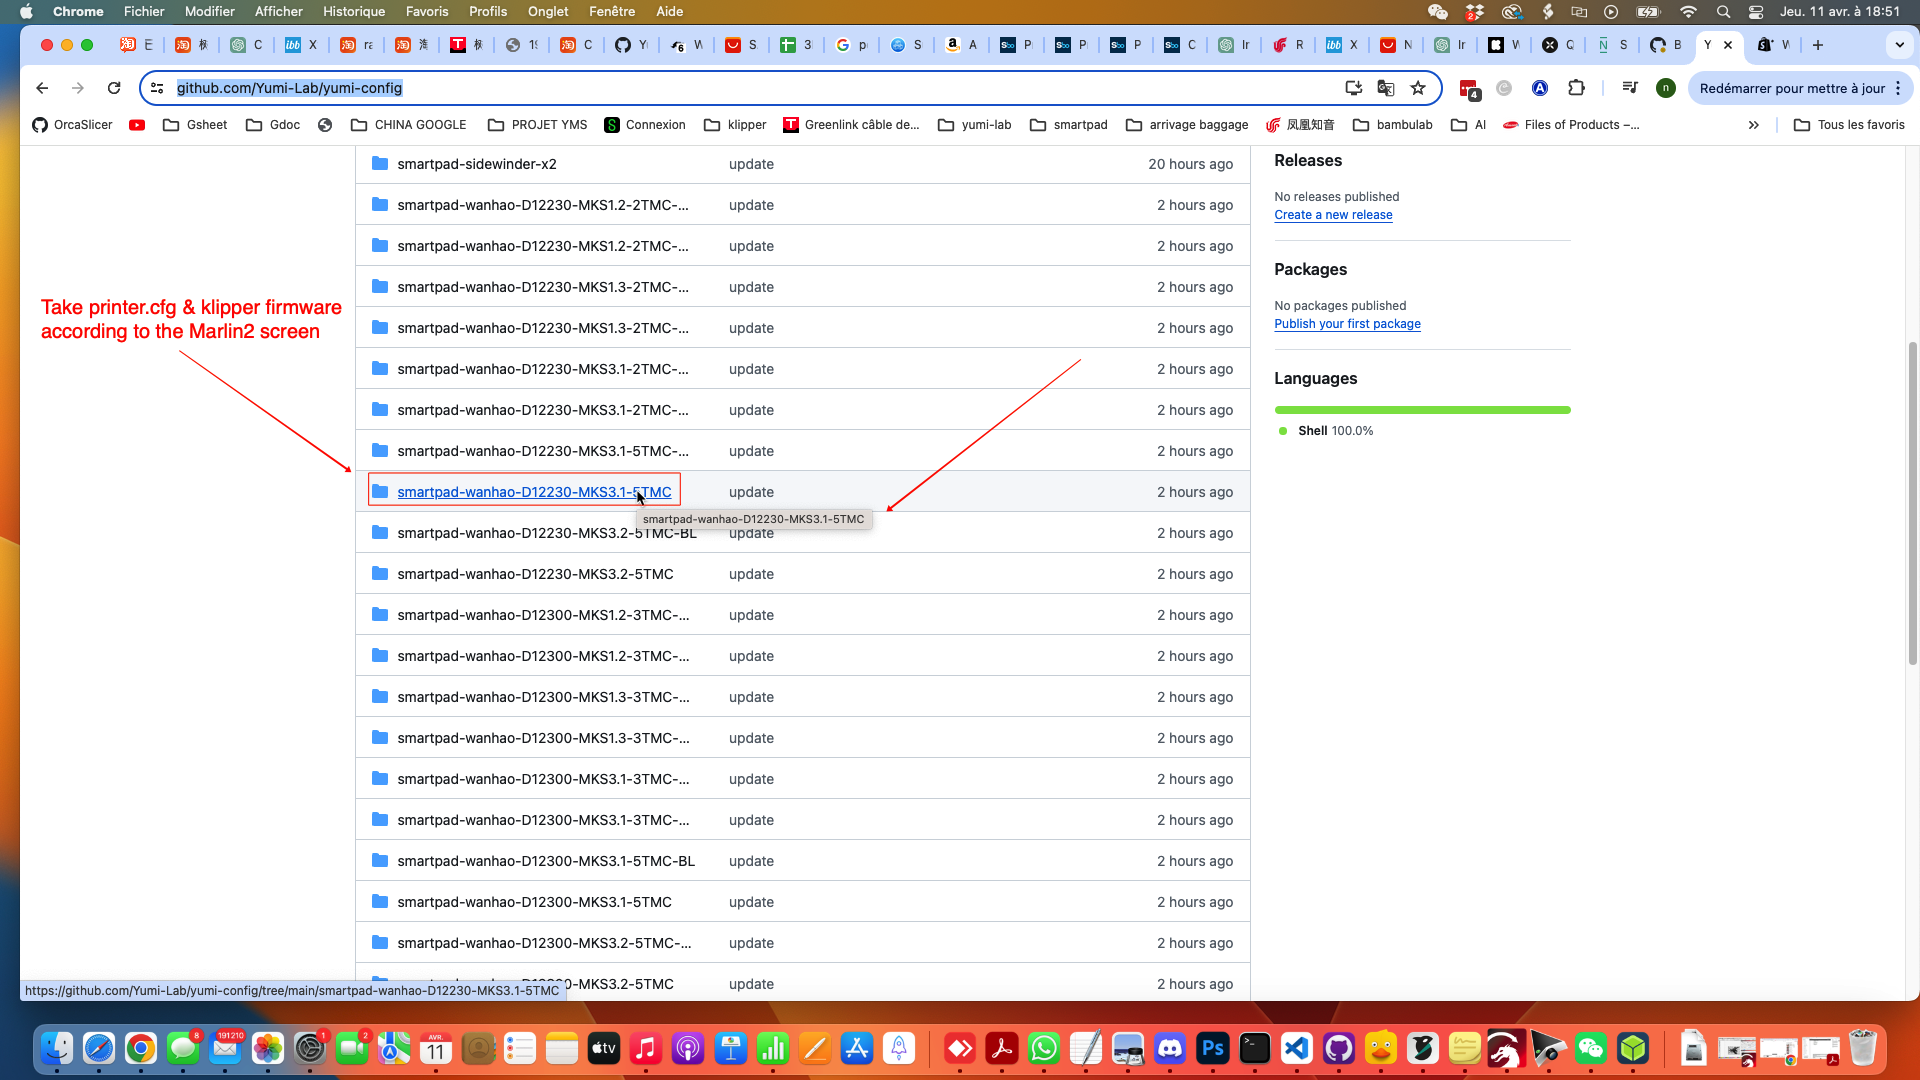
Visit the GIT HUB YUMI-CONFIG: https://github.com/Yumi-Lab/yumi-config.
Download the file printer.cfg and the Klipper firmware *.bin according to the Marlin2 Screen 'ABOUT' menu.
Please read the readme.txt file to rename the *.bin file appropriately.
After renaming the file according to the readme.txt, place the .bin file in the root folder of your microSD card and insert it into your printer.
Wait for the update to complete without turning off the printer.
Remove your microSD card and reboot your printer.
To finalize, open your MAINSAIL INTERFACE at http://yumios.local or http://"smartpad ip".
Finally, go to the Machine menu and replace the printer.cfg with the one you just downloaded from GitHub. Please click to save & restart.
Slicer profile
Orcaslicer
Add the profile for the wanhao d12 300 to the predefined printers. then download the profile for your printer (230, 300, 500) and import it. there's a version with bltouch and one without.
It's an optimized profile. As a reminder, you need to adapt the profile to your 3d models.
https://github.com/Yumi-Lab/yumi-wiki/raw/main/Profile_Slicer/Orcaslicer/WanhaoD12Orcaslicer.zip
Print
I recommend starting with a calibration cube.
https://www.thingiverse.com/thing:1278865
Once you've got a perfect cube, you can start printing 😉