2.4 OpenMediaVault

Openmediavault is a reference for anyone who wants to build their own DIY NAS.
Prerequisites
-Installing a smartpi, LINUX BOOKWORM SERVER is recommanded.
-During linux server installation please create user: pi
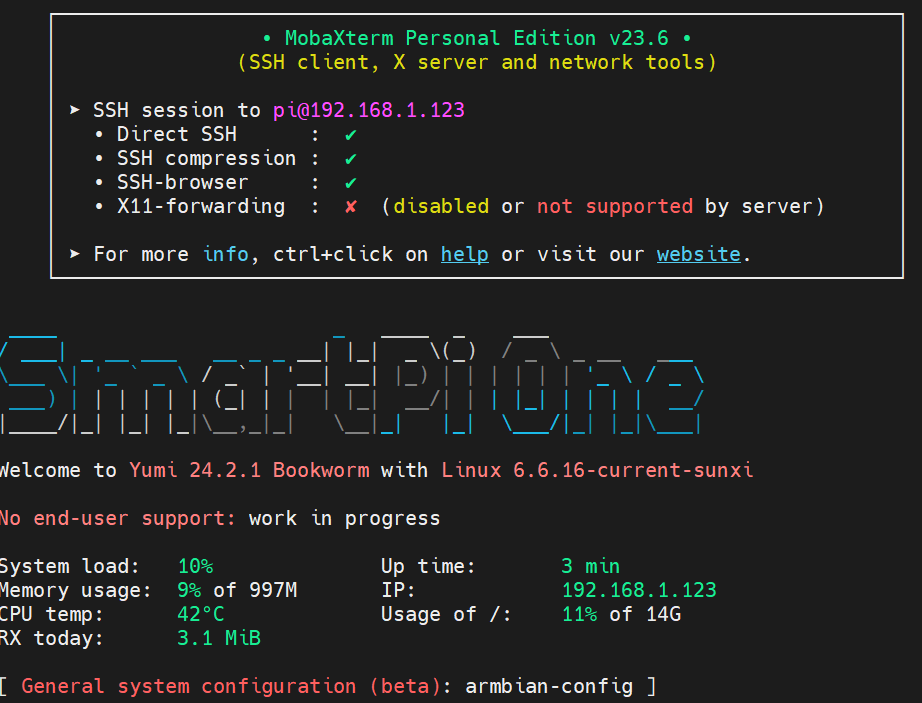
Connect to the smartpi via ssh with mobaxterm or putty, for example.
Update the smartpi
Install
Switch to Superuser:
Install the openmediavault keyring manually:
 apt-get install --yes gnupg
wget --quiet --output-document=- https://packages.openmediavault.org/public/archive.key | gpg --dearmor --yes --output "/usr/share/keyrings/openmediavault-archive-keyring.gpg"
Add the package repositories:
cat <<EOF >> /etc/apt/sources.list.d/openmediavault.list
deb [signed-by=/usr/share/keyrings/openmediavault-archive-keyring.gpg] https://packages.openmediavault.org/public sandworm main
# deb [signed-by=/usr/share/keyrings/openmediavault-archive-keyring.gpg] https://downloads.sourceforge.net/project/openmediavault/packages sandworm main
## Uncomment the following line to add software from the proposed repository.
# deb [signed-by=/usr/share/keyrings/openmediavault-archive-keyring.gpg] https://packages.openmediavault.org/public sandworm-proposed main
# deb [signed-by=/usr/share/keyrings/openmediavault-archive-keyring.gpg] https://downloads.sourceforge.net/project/openmediavault/packages sandworm-proposed main
## This software is not part of OpenMediaVault, but is offered by third-party
## developers as a service to OpenMediaVault users.
# deb [signed-by=/usr/share/keyrings/openmediavault-archive-keyring.gpg] https://packages.openmediavault.org/public sandworm partner
# deb [signed-by=/usr/share/keyrings/openmediavault-archive-keyring.gpg] https://downloads.sourceforge.net/project/openmediavault/packages sandworm partner
EOF
Install the openmediavault package:
connection to web interface

The default logins are :
Username: admin
Password: openmediavault
You can now connect a disk and create shares.
Add Disk
Please note that not all changes are applied immediately. Each change requires validation. If you see the following message, this means that changes are pending. Click on validate to apply them.

Connecting an external usb hard drive Go to Storage\File Systems
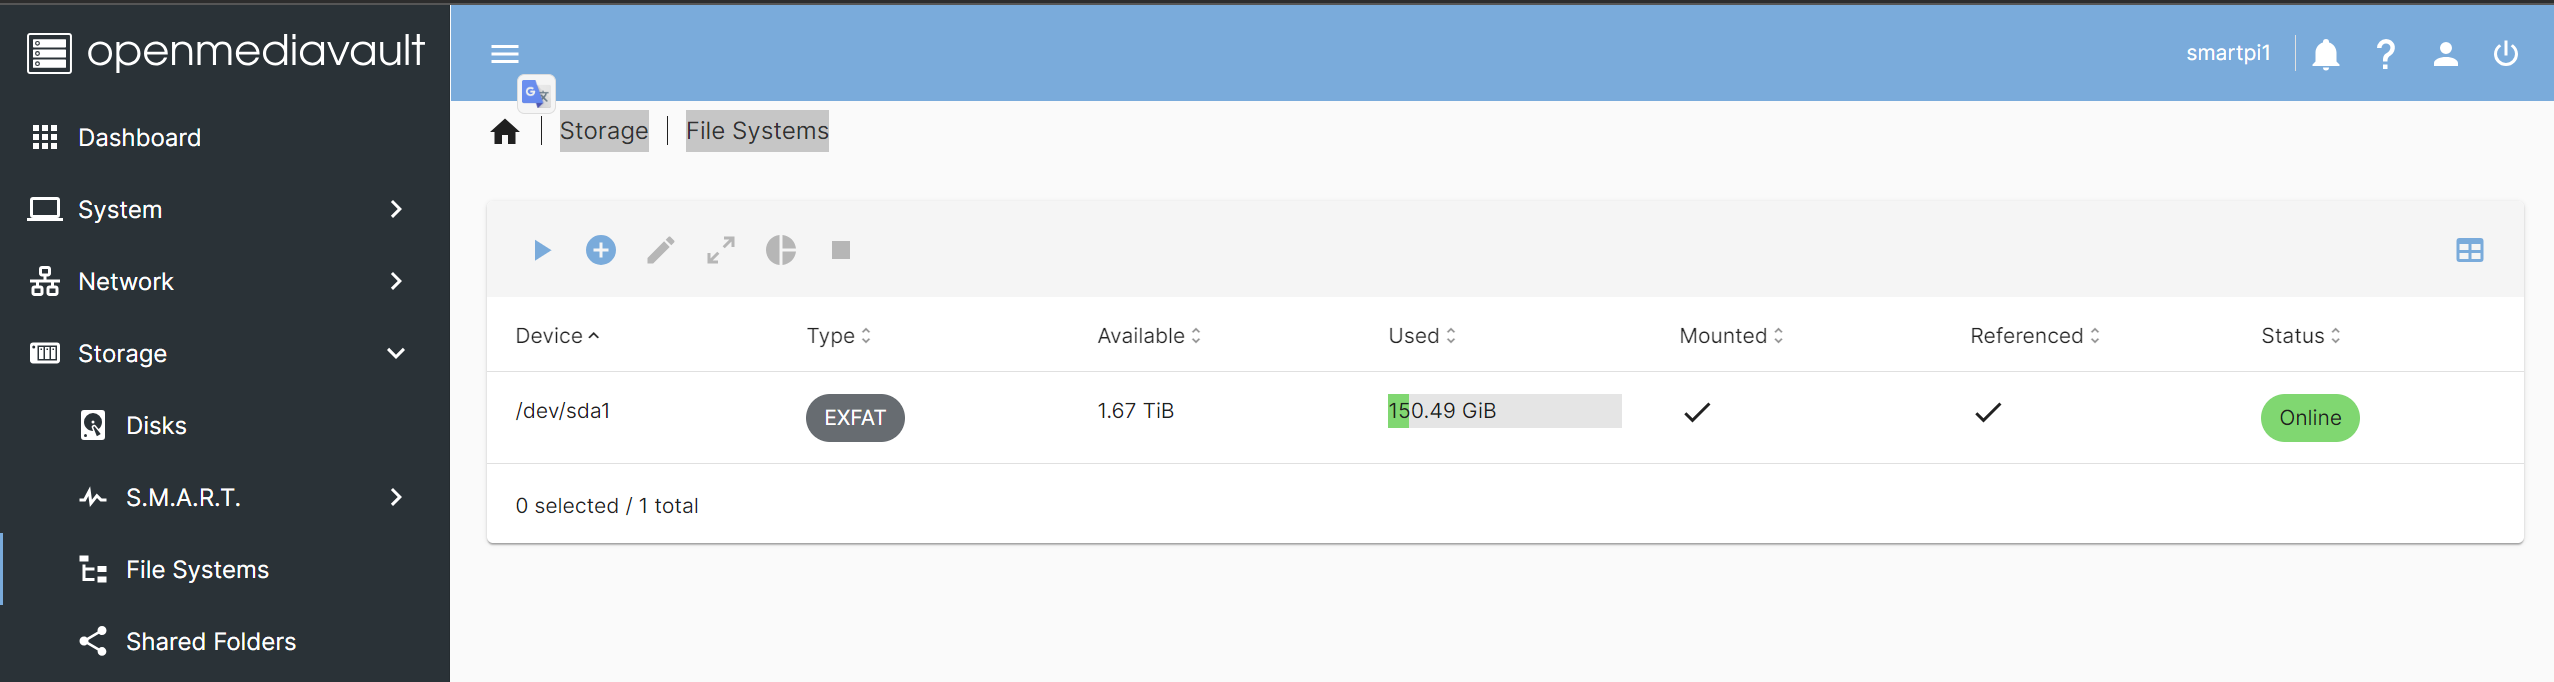
Click on the Play button
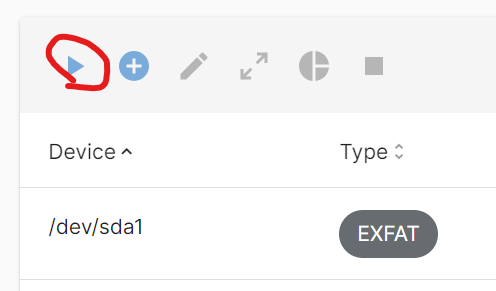
Select your disk and click on Save

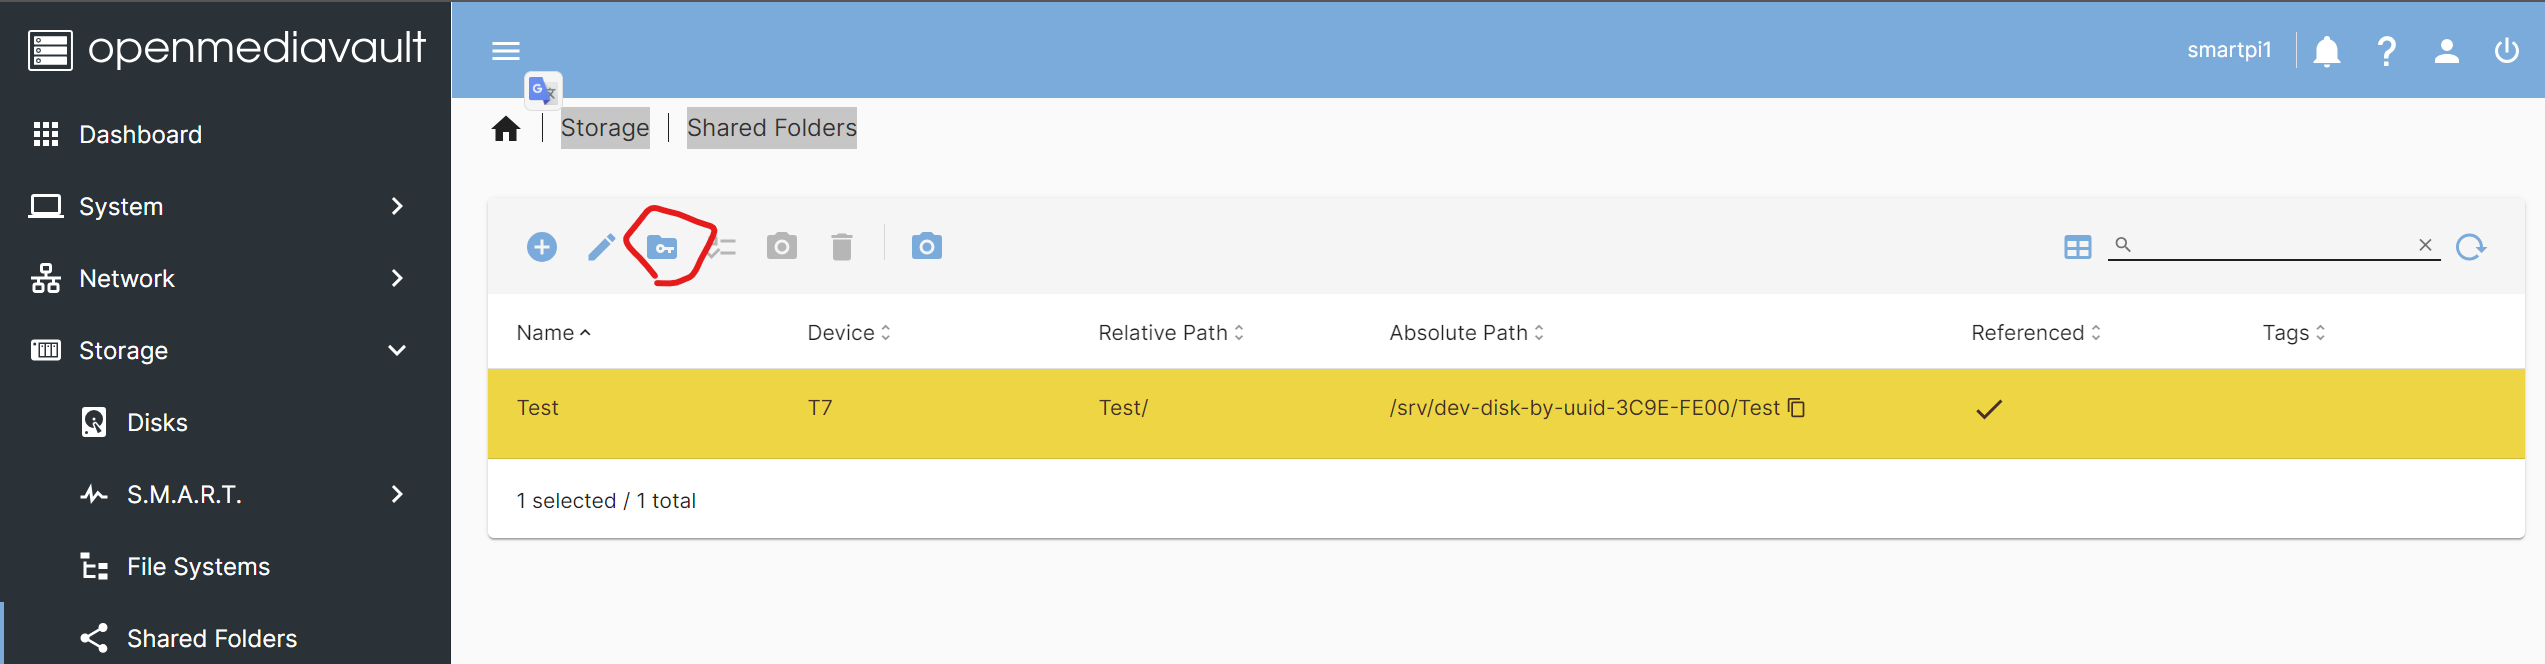
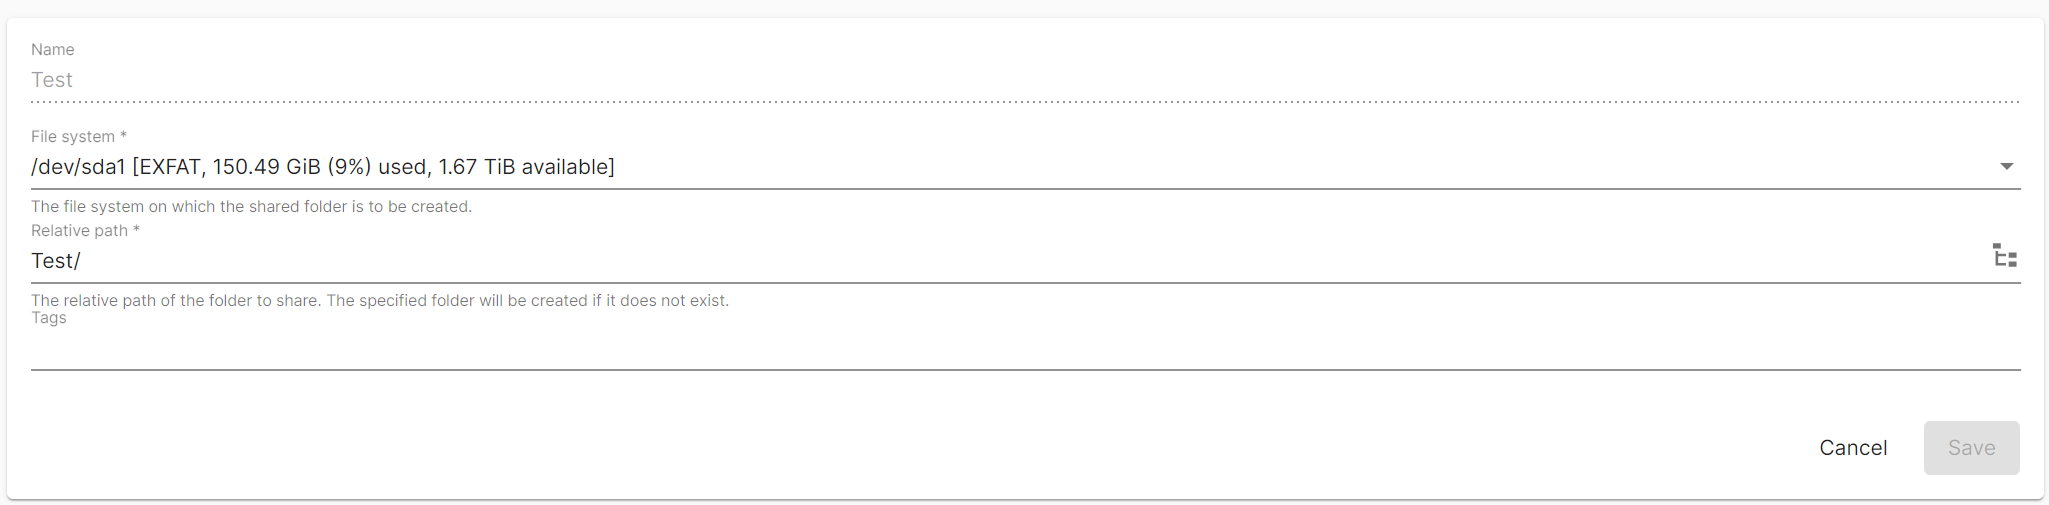
Go to StorageShared Folders then click on + to create a new share
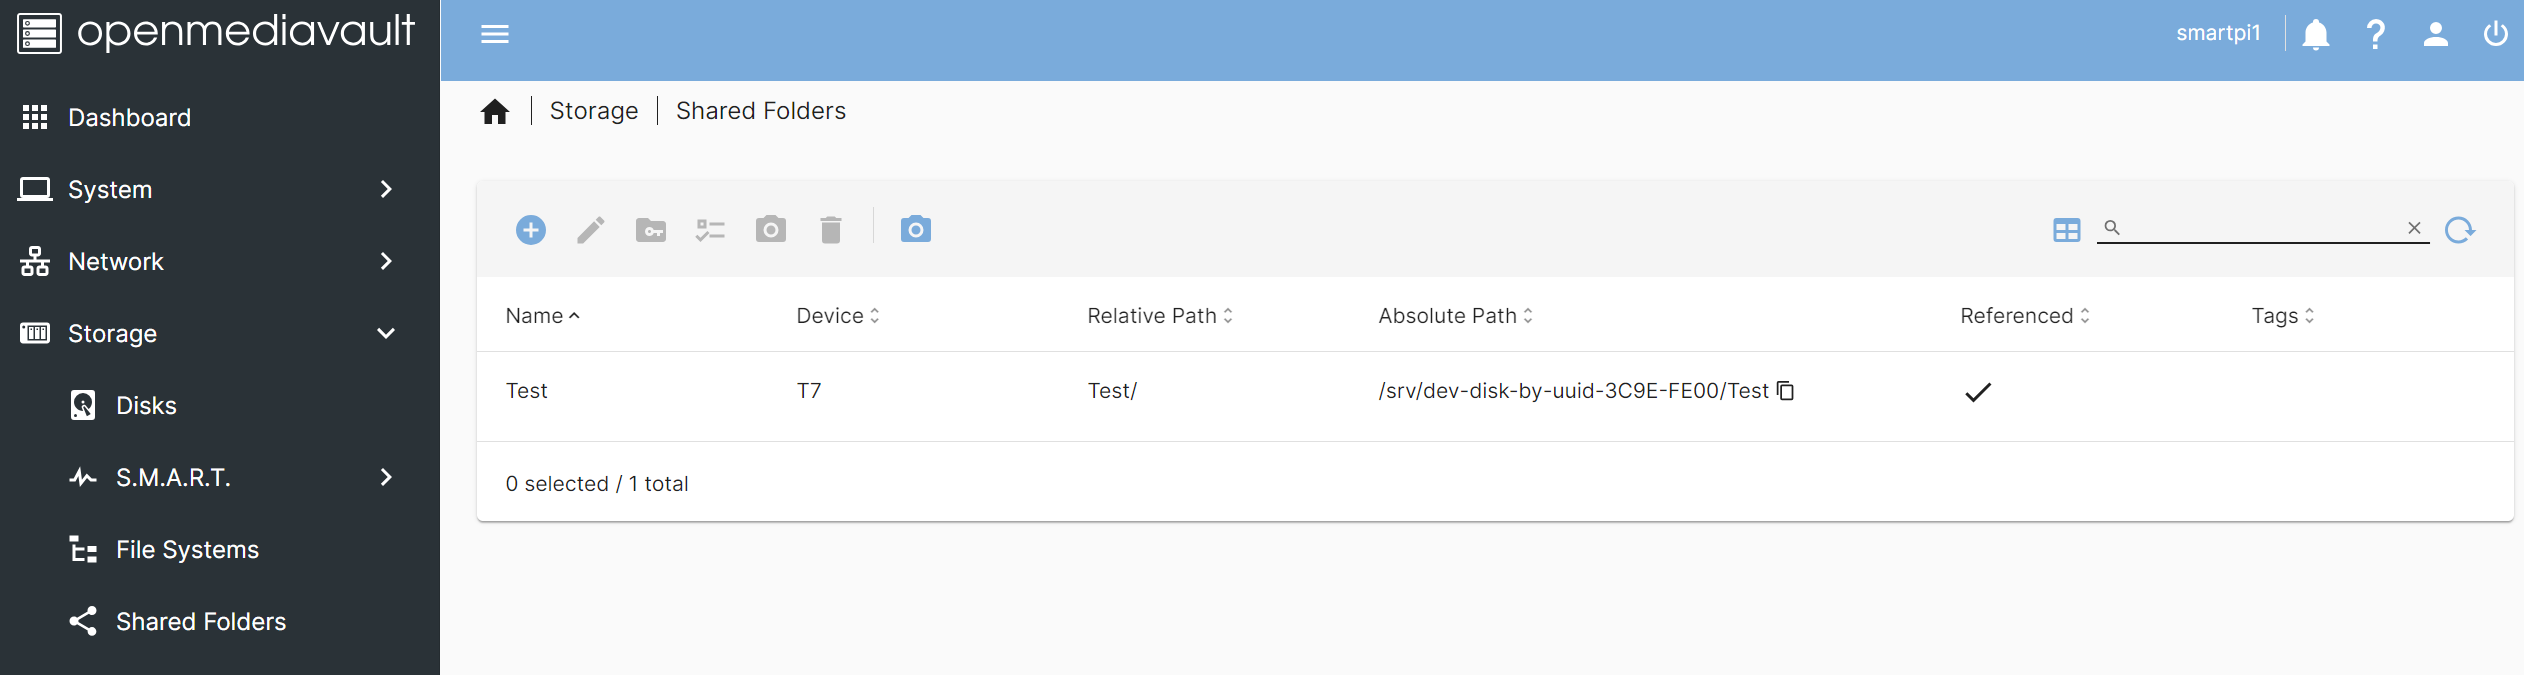
The name field corresponds to the name of the share. The FileSytem field corresponds to your disk The relative path field corresponds to the name of the folder created on your disk. Once completed, click on Save
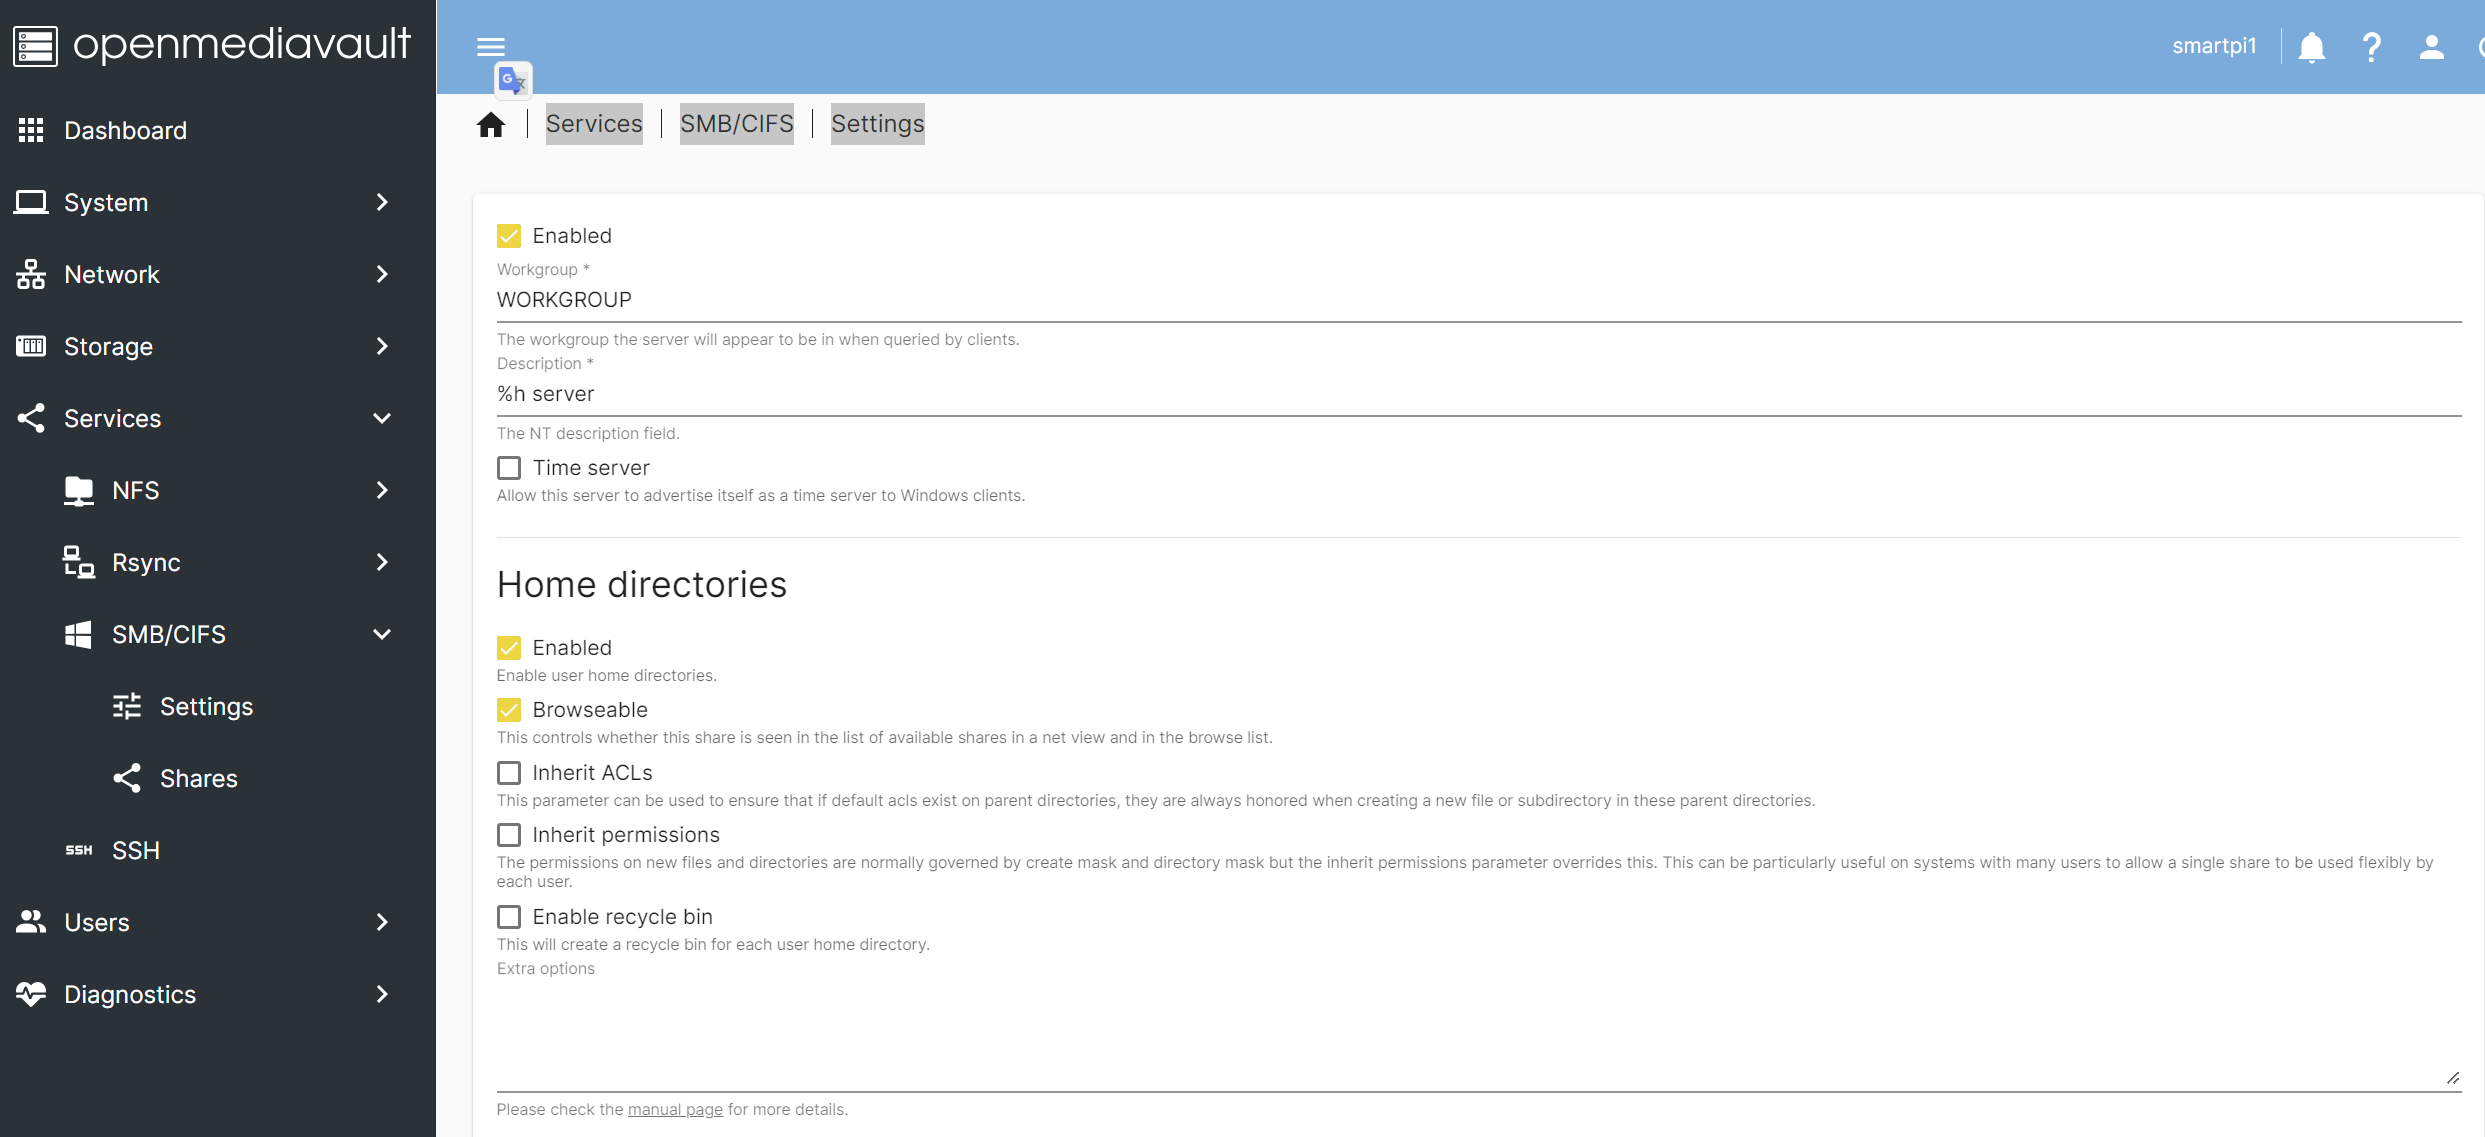
If it's for a Windows share, go to Services\SMB\CIFS\Settings Activate the service and select the features you want. Once completed, click on Save
Then go to Services\SMB\CIFS\Shares and click on the pencil to choose the options that interest you.
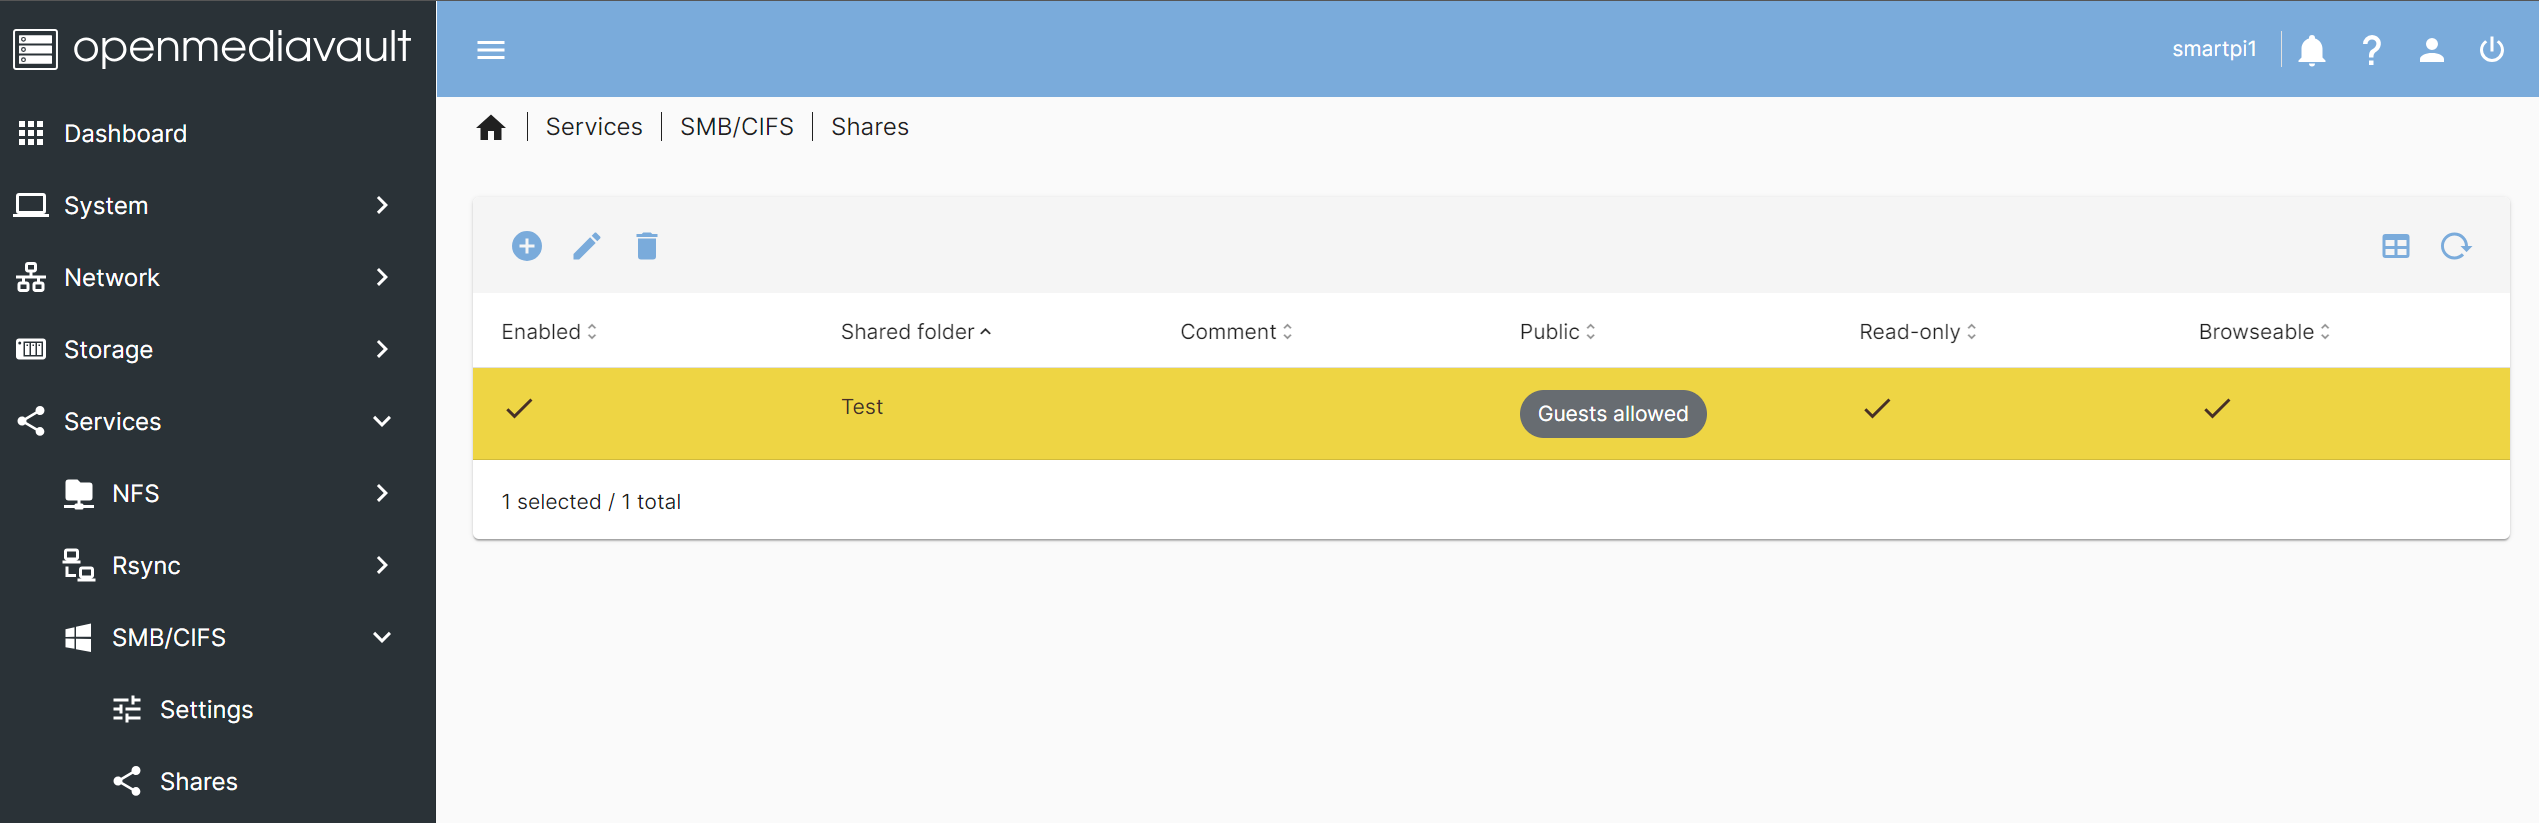
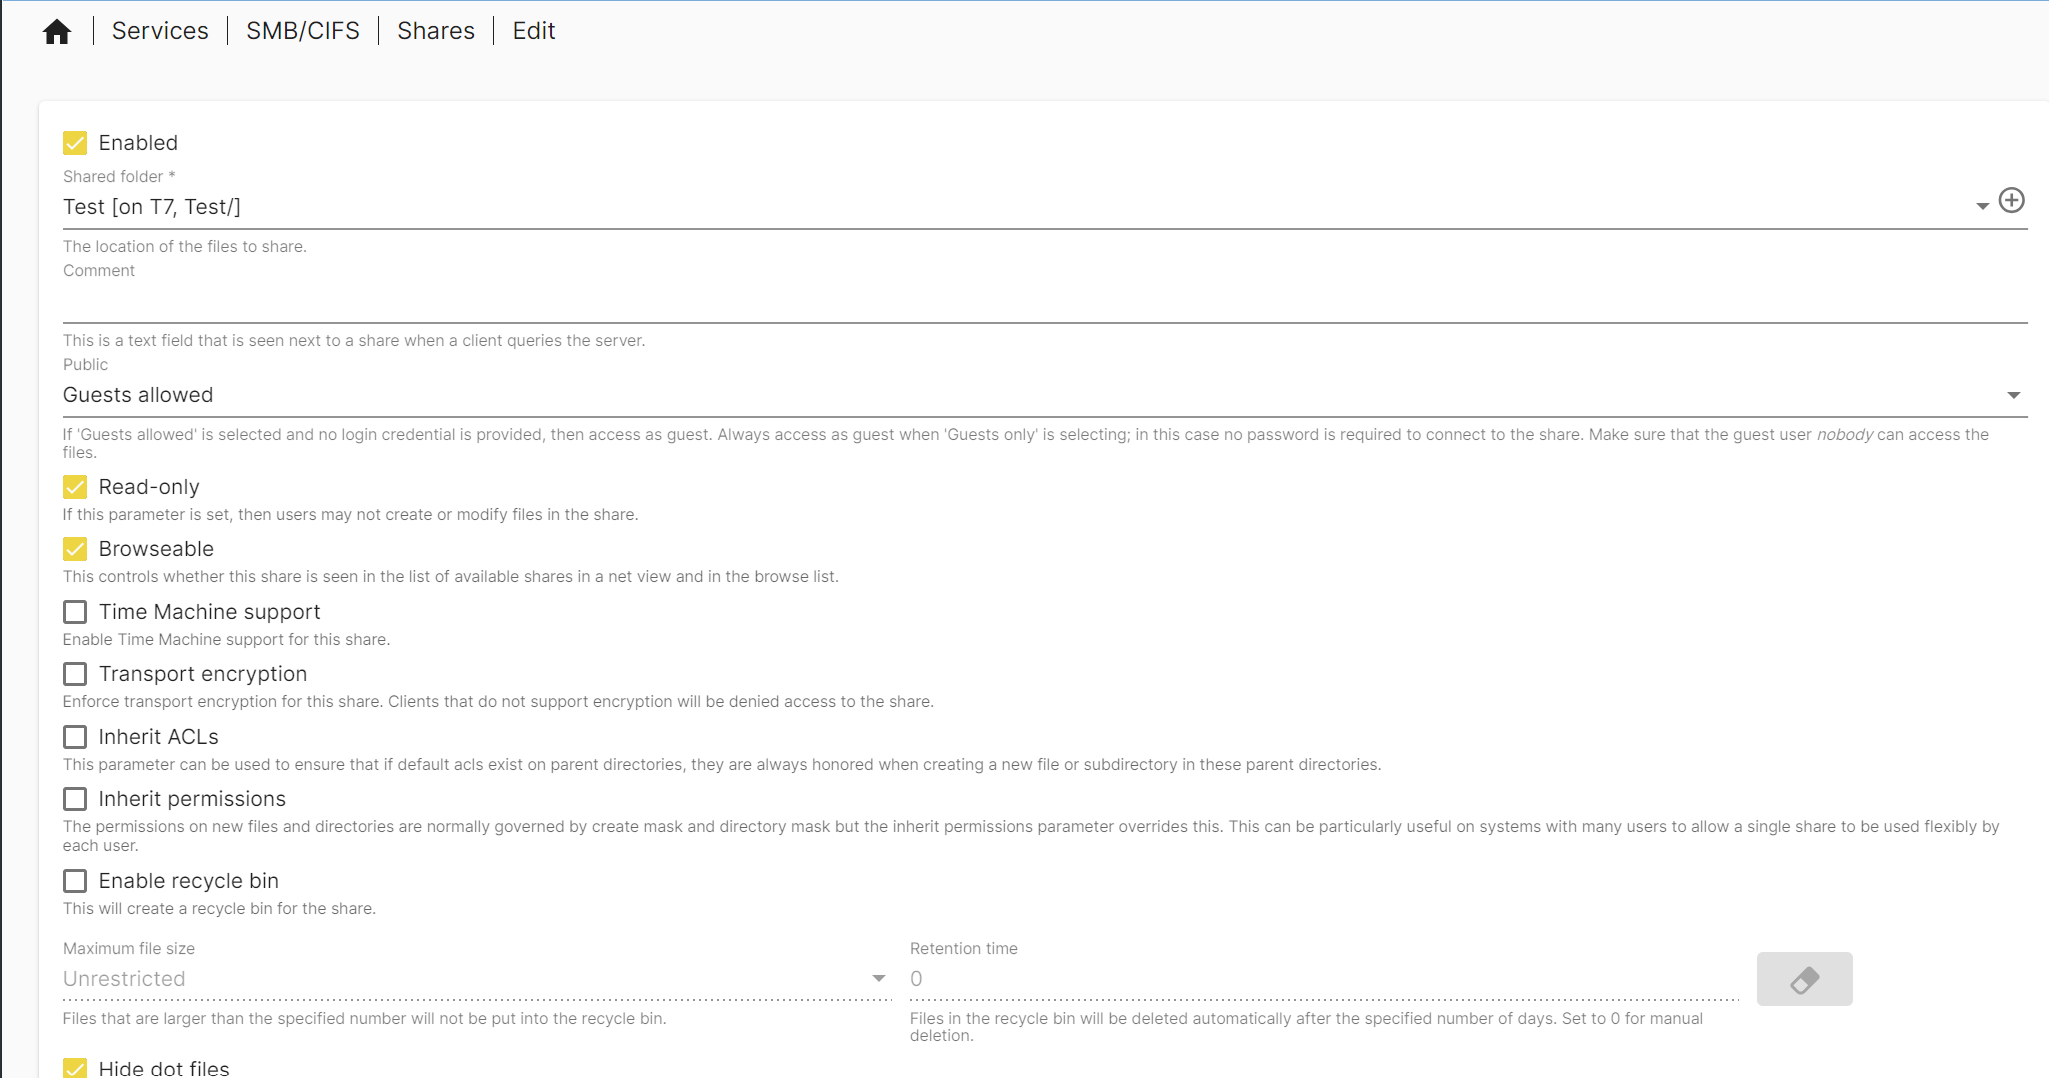
Once completed, click on Save
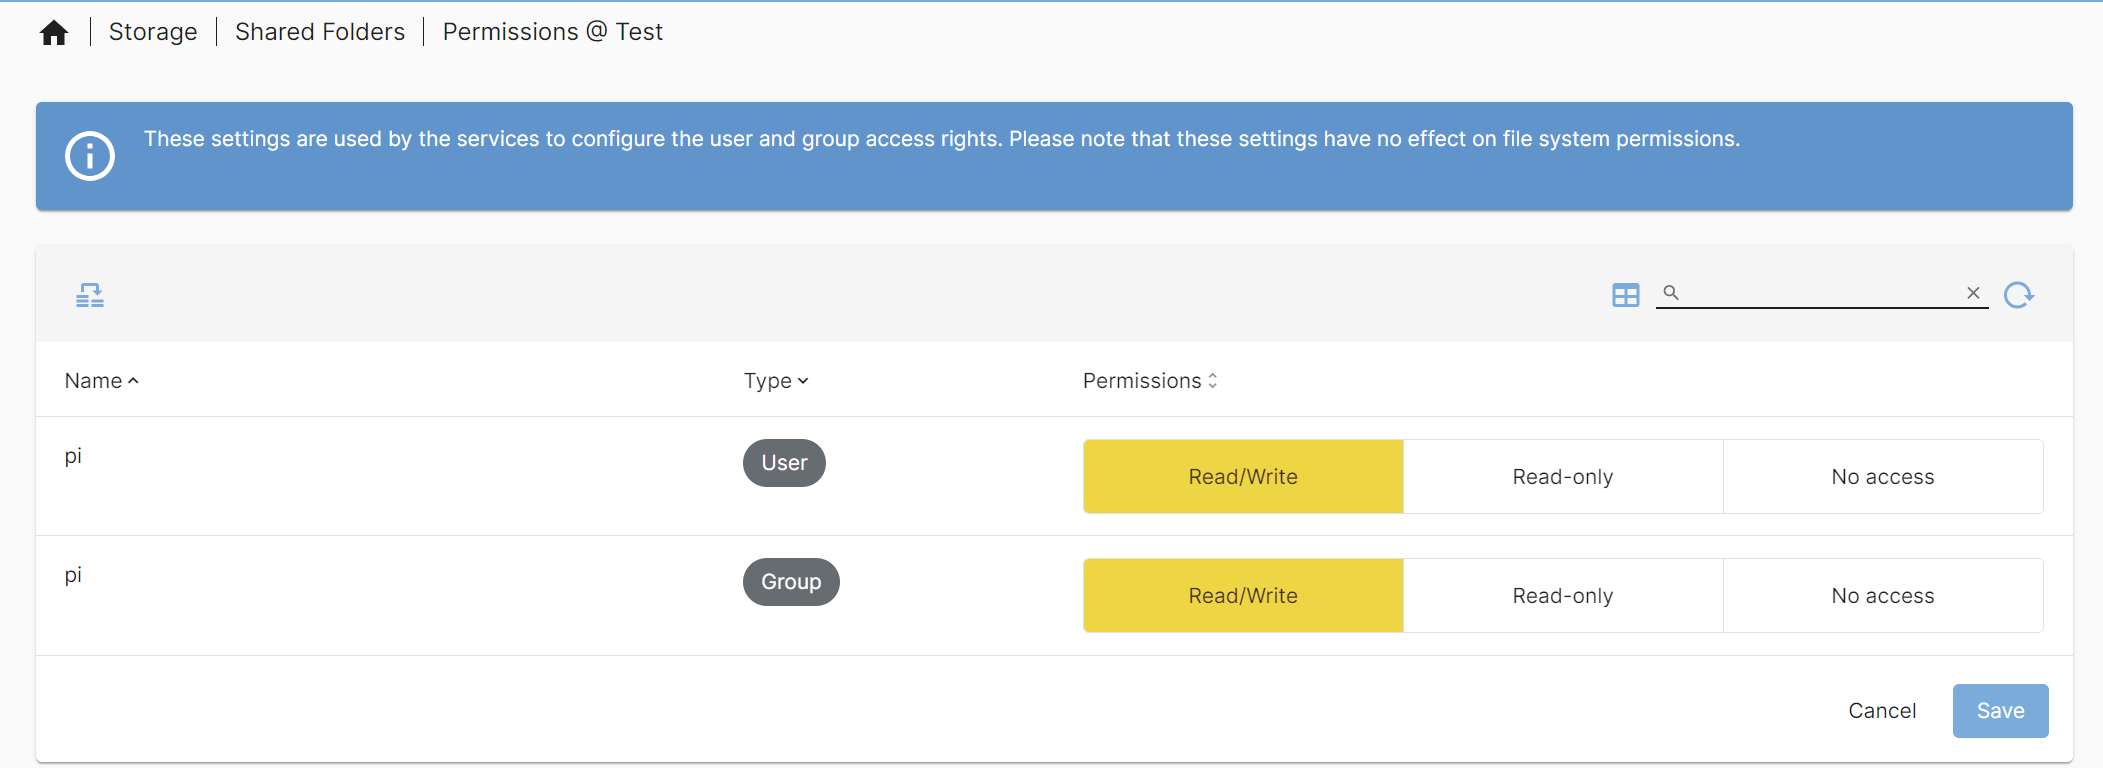
Return to StorageShared Folders. select your share and click on permission. Then choose the desired permission