2.4 Using a Buzzer with Smart Pi One
This page describes how to connect and use a buzzer with the Smart Pi One, including wiring instructions, and code examples in both Python and C.

Required Materials
- Smart Pi One
- Active or passive buzzer
- Connecting wires
- Breadboard (optional for easier connections)
Wiring Diagram
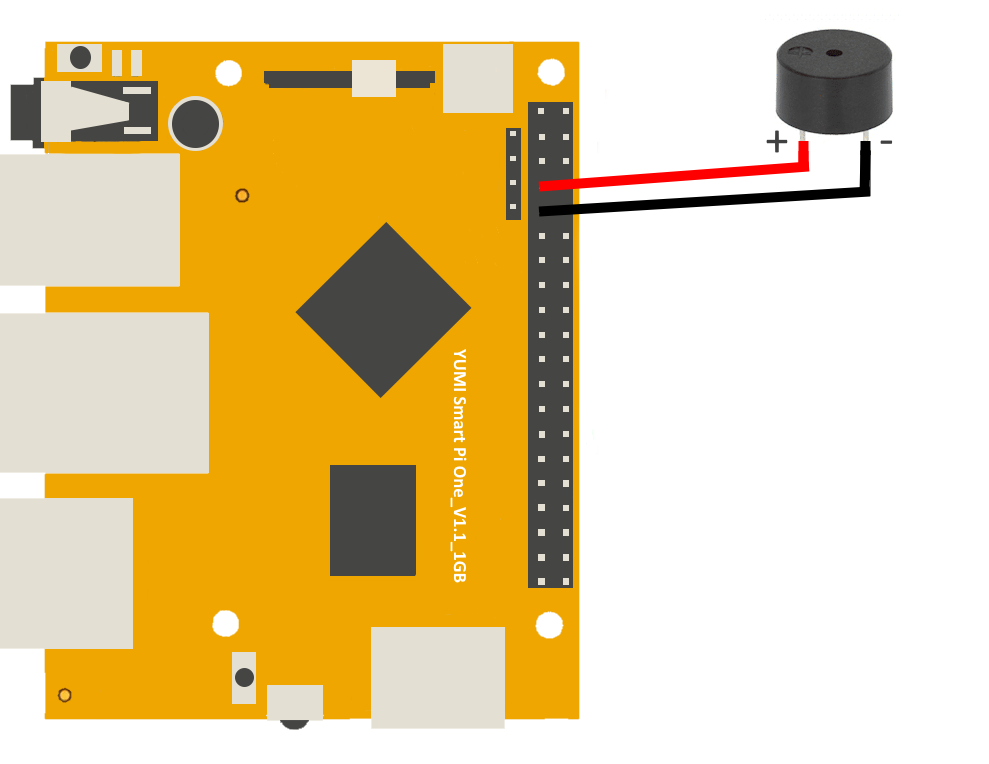
Below is a sample wiring diagram for connecting a buzzer to the Smart Pi One:

| Component | Smart Pi One Pin | Description |
|---|---|---|
| Buzzer (+) | GPIO7 | Connect to the positive terminal of the buzzer |
| Buzzer (-) | GND | Connect to the ground (GND) pin |
Connecting the Buzzer: - Connect the positive terminal of the buzzer to a GPIO pin on the Smart Pi One (e.g., GPIO7). - Connect the negative terminal of the buzzer to the ground (GND) pin on the Smart Pi One.
Prerequisites: Configuration of smartpi-gpio
To install SmartPi-GPIO on your Smart Pi One, follow these steps:
- Update system:
sudo apt update
sudo apt-get install -y python3-dev python3-pip libjpeg-dev zlib1g-dev libtiff-dev
sudo mv /usr/lib/python3.11/EXTERNALLY-MANAGED /usr/lib/python3.11/EXTERNALLY-MANAGED.old
- Clone the repository:
- Install the library:
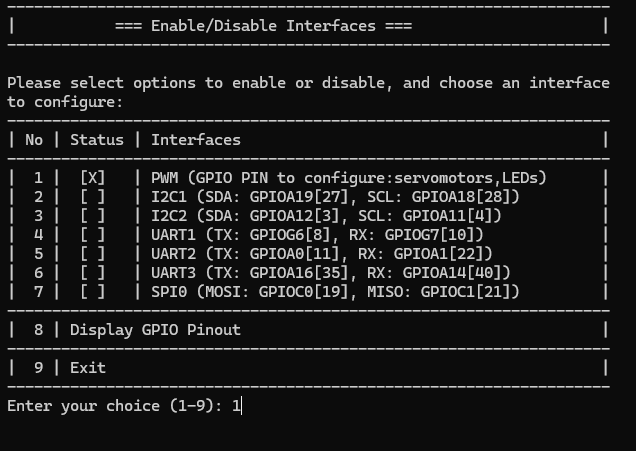
- Activate GPIO interfaces:

Using Python
Creating the Python Script
- Open a terminal on your Smart Pi One.
- Create a new Python file using
nano:
- Copy and paste the following Python code into the file:
import time
from smartpi_gpio.gpio import GPIO

# Initialize GPIO
gpio = GPIO()
BUZZER_PIN = 7

# Set GPIO7 as output for the buzzer
gpio.setup(BUZZER_PIN, gpio.OUT)

try:
    while True:
        # Turn the buzzer on
        gpio.output(BUZZER_PIN, gpio.HIGH)
        print("Buzzer ON")
        time.sleep(1)  # Buzzer stays on for 1 second

        # Turn the buzzer off
        gpio.output(BUZZER_PIN, gpio.LOW)
        print("Buzzer OFF")
        time.sleep(1)  # Buzzer stays off for 1 second
except KeyboardInterrupt:
    pass
finally:
    gpio.cleanup()  # Clean up GPIO
- Save the file by pressing
CTRL + X, thenY, and finallyEnter.
Running the Python Script
To run the Python script, use the following command:
